Quantcast
Channel: Mello Mike's Overland Adventures
Viewing all 66 articles
Browse latest View live

Weekend Campout on Mt. Graham, AZ

$
0
0
A couple weeks ago the family and some friends got together for a weekend camp out on Mt. Graham to celebrate the end of another year of college. This was our second time on Mt. Graham, the first was last September, an account of which can be found by clicking here.

We had several choices where we could camp but chose to camp where we did last September, in Treasure Park. We had another big group this time out. With me was my wife, Karen, and my sons, Nathan, Ammon, and Daniel. Along with us was Nathan's wife, Jessica, and her parents, Matt and Brenda, her sister, Holly, and brother, Josh, and his wife, Audra. We also brought the two canine members of our family, Pepe and Abby.

We boondocked in Wolfy, of course. How many people can you comfortably entertain in a Wolf Creek 850 truck camper? The picture above should tell you, and we could've easily seated another at the dinette. In spite of the room, the boys decided to camp out in their tents so they had some room to stretch out. Since we brought the dogs with us they needed a place to sleep and it wasn't going to be up in the bed with us. They simply got too dirty running around outside to do that each night. The temperatures were pretty close to perfect during the weekend, highs around 67 and lows around 50. Unlike the last time we visited,we didn't get a drop of rain.

The altitude at Treasure Park is at an even 9,000 ft, so if you're not used to the altitude it can make you feel a little sleepy and tired (it took us about a day to get used to the altitude). You can quickly become dehydrated at altitude as well, so you really need to keep up on the fluids. Treasure Park offers about a half dozen developed sites that include a fire ring, picnic tables, and bear boxes to store garbage and food. The sites can be reserved, but if they're not reserved, it's first come, first served. Because of this you need to get there early on Friday before the big weekend rush. As you can see in the pics, the site wasn't the most level, but it was one of the best there, so we had to break out the leveling blocks to get us at even keel.

View of our campsite facing Northwest.
View looking southeast. 
Another view facing west.
Tents where our boys slept.
Pancakes for breakfast.
Sitting around the morning campfire.
Goofing off in front of the camera before breaking camp.

In case you're curious about the name of the park, the following was taken from a historical plaque posted within the park: "Treasure Park is so-called because of stories of buried treasure. Legend has it that in the 1850's, a large quantity of gold and silver was stolen from mines in Mexico by bandits. It was loaded onto burros, packed into Arizona, and buried here. The burial spot was marked by three granite stones, colored and placed upright forming a triangle. Around 1909, the forest supervisor, T. T. Swift, discovered three colored granite stones at Treasure Park. Although he dug more than six feet to bedrock, no treasure was found. Like many other lost treasure stories this one has been discounted but it remains a colorful part of Mt. Graham history."

Take Two: Another Trip to the CAT Scale

$
0
0
Back in April I took my new Ram 3500 and my Wolf Creek 850 truck camper to a CAT scale in Nephi, UT to get weighed. Together the combo weighed a shocking 11,920 lbs, a full 600 lbs more than I expected. I knew that figure was way too high, so I took it to Love's Country Truck Stop in Chandler, a short distance from my house, to get reweighed.

This next visit to the CAT scale went much better. Without me and the wife the combo came in at 10,940 lbs (GVWR 11,700 lbs). The front axle weighed 4,640 lbs (GAWR 6,000 lbs), while the rear axle came in at 6,300 lbs (GAWR 7,000 lbs). These figures are what I expected to see when I first bought the truck. With the wife and I, the combo will be around 11,300 lbs, giving us an additional 400 lbs of payload (my Ram 3500 has an official payload of 3,800 lbs). So what's the moral of the story? Not all scales are accurate. If the numbers don't seem right, take your truck and camper to another scale and get reweighed.

So what does my Wolf Creek 850N truck camper actually weigh? Well, since the GVWR of my truck is 11,700 lbs and the payload is 3,809 lbs, my truck's official curb weight is 7,897 lbs. The CAT scale says that together the truck and camper weigh 10,940 lbs. The tailgate, which had been removed, weighs about 50 lbs. Subtracting the truck's curb weight from the total CAT scale weight yields a figure of 3,093 lbs, the weight of the camper. So the Wolf Creek 850N weighs close to 3,100 lbs. This is 800 lbs more than the listed wet weight figure listed on the camper's official sticker (see below). 

If you own a truck camper and you've never taken it to a CAT scale to have it weighed, I strongly recommend that you do so. Doing so can give you peace of mind knowing that your truck and camper are within specs. However, if you find that you're over the GAWR and GVWR ratings for your truck, then you need to do something about it. Safety for you and your family matters. The price for this peace of mind is only $10.00.

The official wet weight of the Wolf Creek 850N, 2328lbs.
Door Jamb sticker showing payload.
Door pillar sticker showing GVWR and GAWR ratings.

Staying Connected - Cellular Internet for RV's

$
0
0

Staying connected on the road is important. This is true not only for RV owners who want to stay in touch with family and friends, but also for RV owners who still work and maintain a blog like me. It wasn't that long ago when we had to rely on wifi at RV parks and bookstores or had to purchase an expensive and bulky satellite system to get the Internet connectivity that we needed. The situation is much better now as cellular technology has advanced. Cellular Internet is not only more reliable now, but it's also much faster. The purpose of this article is to explain how I stay connected using AT&T's cellular network while enjoying the full mobility of my RV.

The smartphone is a wonderful invention. Aside from the obvious, I use it for everything from playing music, getting directions, and obtaining the latest weather, to leveling my rig, locating dump sites, and determining elevation. I also use it to perform what is called "tethering,"a feature that allows me to share my smartphone's Internet connection with other computers. Smartphone tethering can be accomplished in one of three ways, a direct USB connection, a Bluetooth wireless link, or a personal hotspot wifi connection. I prefer the hotspot option because it allows me to connect several computers at the same time and because it's easy to do. A great thing about using a hotspot is that since all tablets and laptops come wireless ready there's no need to run wires or install special equipment in your RV. The smartphone I use for hotspot tethering is an Apple iPhone 5.

If you're interested in hotspot tethering, you have lots of choices. Together, the four national cellular data network providers--AT&T, Verizon, T-Mobile, and Sprint--offer over 60 smartphones that are hotspot capable. They come from the major phone manufacturers like Apple, Samsung, HTC, and LG, come in various shapes and sizes, and employ a variety of mobile operating systems, including Android, iOS, webOS, and Windows Phone. Of these, Google Android is currently the most popular with Apple iOS coming in a close second (I prefer iOS devices which is why I use an iPhone 5). If for some reason you aren't interested in purchasing a smartphone, another hotspot option is available--a portable mifi device like AT&T's Liberate. A mifi device works like a smartphone wifi hotspot, but mifi offers a few additional advantages by allowing you to manage your device connections and by providing superior battery life. A mifi router also costs less than a smartphone, which makes it an attractive option.

Before you can activate a wifi hotspot, you'll need to purchase a monthly cellular data plan from one of the aforementioned providers. The largest data providers, AT&T and Verizon, require a two-year commitment, while the smaller providers, Sprint and T-Mobile, don't. Verizon's 4G LTE coverage is the best nationwide, including in rural areas, but their pricing is also the worst. On the other hand, AT&T's pricing is excellent and their LTE network is faster, but their 4G coverage in rural areas is lacking. Due to their coverage deficiencies, AT&T significantly reduced their rates a few months ago to make them more competitive with Verizon. For instance, my AT&T 10GB Mobile Share data plan (with unlimited talk and text) for two smartphones and one "dumb" phone costs $145 a month, while a comparable plan from Verizon will set you back $220. Next to cost, coverage and network reliability should be your biggest considerations. So make sure you choose a plan that is affordable and offers sufficient coverage and reliability in the areas where you live and where you like to camp.

AT&T 4G Coverage map of the US.
An iPhone 5 wifi hotspot can tether up to 5 computer devices.

What kind of Internet services can you expect to use on a cellular data plan? Basically, you can do the same things on a cellular Internet network that you can at home. This means you can browse the Internet; check email; shop; bank online; access company intranets; upload, download, and stream audio, video, and games; and use Voice over Internet Protocol (VoiP). However, if your data plan is limited like my 10GB plan, you can quickly eat up your allotted data by watching Netflix, so we avoid using streaming video on the road and rely on DVD's instead. This approach works for us and we've never once exceeded our 10GB limit. Indeed, the most we've ever used in a month was 7GB. But then again, we aren't full-timers either. One final thing to remember is that those Internet services which require a lot of bandwidth, like Netflix and YouTube, will require service on a 4G tower to work optimally.

Activating a wifi hotspot on your smartphone is easy. To illustrate just how easy, here's how you do it on an iPhone 5. Go into "Settings," then tap on "Personal Hotspot" (I recommend establishing a strong password during setup as it will provide security for your connection and prevent others from using your hotspot who may happen to be parked near you. Once you establish a password, you won't have to do it again). To activate your hotspot, simply slide the activate button to the right. You should now see your smartphone listed on your laptop or tablet's wireless network listing. Select it, then enter the hotspot's password. You should now be connected. See how easy it is? Note, that running the wireless hotspot will quickly run down your smartphone's battery, so you'll want to keep it plugged in to a USB charging port while it's broadcasting. And if you're wondering if you can tether and take phone calls simultaneously, the answer is, yes.

In order to activate a wifi hotspot, you'll need to be located in an area serviced by a 4G, 3G, or 2G cell tower. If you're in range of a 4G cell tower your smartphone will display either a "4G" or "LTE" in upper left-hand corner (LTE stands for Long Term Evolution). I've been able to receive full 4G service on the road even with a signal strength of one bar. As long as you have one bar and the phone says you're receiving a 4G signal you'll be able to surf at high speed. If your phone displays either a "3G" or an "E" (this stands for Edge) instead of 4G, however, that means you're receiving a 3G or 2G signal respectively. Of these, 4G LTE provides the fastest Internet connectivity with download speeds between 5 and 13 MBPS, while regular 4G offers download speeds between 3 to 8 MBPS. These speeds are much faster than 3G downloads which top out at 950 KBPS and Edge 2G downloads which max out at 250KBPS. Because of the low speeds you won't be able to upload, download, and stream audio, video, and games on an Edge 2G tower.

AT&T data coverage for Arizona. Dark orange areas indicate 4G. 

As you can see in the map above, AT&T's 4G data coverage in Arizona is excellent in the major metropolitan areas and along the interstate corridors. This includes popular snowbird and boondocking destinations in Quartzsite, Yuma, Tuscon, and the greater Phoenix area. Unfortunately, 4G service is non-existent in the towns of Heber, Show Low, Pinetop, and Eagar, popular summer retreats for locals looking to escape the heat. It's also non-existent in the Navajo Nation in the northern part of the state and some of the more remote parts of the state. Yes, you can get Edge 2G service in most of these areas, but it is a lot slower than 4G service. Fortunately, the cooler climates in Flagstaff, Prescott, and Payson have excellent 4G coverage to help offset 4G coverage deficiencies in the White Mountains. Note: in the map above, 4G coverage is indicated in dark orange, 3G light orange, Edge 2G tan, and Edge 2G shared provider tan with diagonal lines.

What's the range for a typical cell tower? That's a great question. Cellular transceivers and antenna arrays transmit on frequencies in the UHF radio band (primarily between 700 - 2100 MHZ), which propagate line-of-sight, similar to rays of light, so the higher the antenna array is mounted the further the signal will travel. Hence, in rural areas you'll usually see cell towers perched atop mountains and hills, while in urban areas you'll see them mounted on buildings and atop tall radio towers and monopoles. Unfortunately, intervening hills and buildings can weaken or block the signal entirely. Because of this you should try and set up camp at higher elevations to obtain the strongest signal. Thus, depending on the terrain where you're located, the height of the cell tower, and the amount of power transmitted, you can receive a 4G signal from as far as 45 miles away.

As a retired Navy communicator, I often take note of cell tower locations while I'm on the road. They're usually easy to spot, but that isn't always the case. As cellular providers strive to improve coverage by erecting more towers they sometimes encounter resistance from municipalities and the local population. Not everyone wants to see a cell tower in their neighborhood or wants to see one overshadowing a prominent landmark in town, so cellular providers will sometimes be required to conceal or camouflage them before a permit is issued. These stealth towers, as they're called, take on various forms from grain silos, church steeples, and building attachments to simple poles, Saguaro cacti, and trees. Some are hidden so well you wouldn't know they were there unless somebody told you.

Co-located cell tower and stealth tower in Mesa, AZ.

At this point you may be wondering if cellular Internet will work for those who like to boondock in remote rural areas, out in the "boonies," if you will. The answer really depends on the location. If you examine the AT&T 4G data coverage map above, you'll notice large gaps in coverage primarily west of the Rockies. This is due not only to the mountainous, sometimes desolate terrain, but also the low population density found in most of these areas. Fortunately, some of these gaps are covered by older 3G and 2G towers and will be replaced in another 3-4 years by 4G towers, yet some gaps never will be closed because of the rugged terrain. If you need service in a particular area, I would access your provider's website and download coverage maps of the area. These can sometimes provide clues on where to camp and what areas to avoid. In areas with spotty coverage, I'm often able to pull-in a signal by heading for the high ground. For those interested, click here to view AT&T's coverage maps. 

So if you need Internet in your RV, you should consider purchasing a hotspot capable smartphone (or a mifi router) and a cellular data plan with the amount of data that you need. If you don't own a smartphone yet, you should get with the times and buy one (over 56% of Americans currently own one). You can pick one up for as little as $100 for 16GB of memory or $200 for 32GB. With the thousands of apps you can download on them, you'll find the smartphone a wonderful RV'ing tool and invaluable communication device. And with the wifi hotspot capability you can stay connected on the road as well, if not better, than you can at home.

The 8 Habits for Highly Effective Boondocking

$
0
0
Ah, boondocking. Just the thought of it evokes images of camping atop a remote, desert mesa or in a cool, heavily wooded mountain forest. If you enjoy beautiful vistas, peaceful solitude, and clean air when you camp, then boondocking is for you. It's a hundred times better than listening to a teeth-rattling generator at a crowded campground or dealing with the confines and the lack of privacy at an ugly and expensive RV park.

If you're an RV owner who has camped exclusively with full-hookups at campgrounds and RV parks, and you're interested in boondocking then you'll need to train yourself on this new way to camp. Unlike before, you'll need to rely on your RV's 12 volt battery system for power, on your RV's fresh water holding tank for potable water, on your RV's black and gray holding tanks to collect waste water, and on your RV's propane system to fuel your refrigerator and your furnace. This also means you won't be able to take "Hollywood showers" or leave the lights on when they're not being used. You can certainly do these things, of course, but you'll quickly run out of fresh water and you'll rapidly drain your 12 volt batteries. In an effort to avoid boondocking boo-boo's like these and others from happening, I present these eight, easily learned habits.

1. Know Where to Go:

The best boondocking can be found west of the Mississippi on federal land managed by the U.S. Forest Service (USFS) and the Bureau of Land Management (BLM). You can also boondock on property managed by the U.S. Army Corps of Engineers, on state and national wildlife preserves, on land owned by timber companies, on state forests, and on private property (with permission, of course). Pinpoint level campsites ahead of time by using maps, apps, blogs, boondocking forums, and Google Earth. Talk to rangers to determine which roads are open for overnight camping. Look for BLM and USFS roads with numbered signs. As long as the gate to the road is open and there are no signs that prohibit camping, then you can boondock along that road, generally within 150 ft.

2. Conserve Your Water: 

Of all your resources, water is your most precious. Use it wisely. Never leave your faucet running while using the tap. Use a half cup of water or bottled water to brush your teeth. Buy an Oxygenics Shower Head and take "Navy Showers," get wet, turn off the water, soap up, then rinse off. Use disposable cleansing wipes for personal hygiene. For meals, use paper plates and plastic cups, bowls, and eating utensils that way you won't need to wash dishes. When dish washing is necessary, wash them in a small tub and save the dish water for flushing the toilet. Keep in mind that limiting the amount of fresh water you use in your RV also limits the amount of gray and black waste water that you generate.

3. Know Where to Get Potable Water: 

Potable water can be obtained from numerous sources while you're off-the-grid. These can include state parks, campgrounds, and USFS ranger stations as well as BLM welcome centers, truck stops, and gas stations. Use a Water Bandit and a hose to get potable water from non-threaded water spigots. For additional water capacity, bring along extra 7-gallon water containers and bottled water. Water can also be obtained from natural sources like lakes and streams, of course, but make sure you filter out any sediments and purify it first before you drink it. Few things can ruin a trip like a bad case of the runs. Buy a funnel or a portable 12 volt water pump to ease the task of filling your fresh water tank from natural sources.

4. Conserve Your Battery Power:

Boondocking RV's should have a minimum of two 12 volt or two 6 volt batteries. Buy deep cycle batteries rather than hybrid RV/Marine batteries. Use the TV, water pump, fans, and lights only when you need them. Replace your higher wattage incandescent light bulbs with lower wattage LED lights. When boondocking in cold weather, avoid using the power sucking furnace to keep warm and instead use either a 0-degree-rated sleeping blanket or a Camco Wave-3 Catalytic Heater (catalytic heaters use propane only, no electricity). If you don't have a battery monitor, like the Morningstar Remote Meter, pictured to the left, or like a Xantrex LinkLITE, buy one. They are a boondocker's best friend and really take the guesswork out of the state of your batteries.

5. Recharge Your Batteries Often:

Avoid draining your batteries below 12.2 volts (50% state of charge). Employ solar power, a wind turbine, or a generator as your primary method for recharging your batteries rather than your truck's alternator, which because of wire size, is too slow. Have a good backup if your primary means for recharging your batteries fails. When going solar, install a minimum of 100 watts of solar panel for each battery in your RV, though more is better. If you decide on a generator, avoid the noisy and cheap industrial types and instead go with the whisper-quiet inverter types, like the Honda EU2000i or the Yamaha 2600. When choosing a wind turbine, buy one that is light, easy to deploy, and generates ample current--at least 6 amps--like the Windwalker 250.

6. Minimize Use of Your Toilet:

Dealing with waste water will perhaps be your biggest challenge while you boondock. The black water tank in your RV is limited in size so minimize use of your toilet as much as possible (this is more difficult for gals and much easier for guys). Use rest stops, restaurants, gas stations, and pit toilets as much as possible. Never fill your toilet bowl with water after flushing--use just enough water to cover the rubber seal in your toilet. Again, use disposable cleansing wipes for personal hygiene. Do not dump black water in the wild. It's illegal and very inconsiderate. Use the excellent Sanidumps.com smartphone app to locate a dump site near you.

7. Be Prepared for Emergencies:

Boondocking may take you beyond cell phone range and calls for help so you'll need to be prepared for all kinds of contingencies. Must have preparedness items for your RV include an emergency roadside kit with a good set of hand tools, a well-stocked first aid kit, a portable air compressor, like the VIAIR 450P, to fill flat tires, and a water purification device. I also like to keep a small roll of eternabond tape on-hand to fix tears in the roof or to repair cracked roof vents and skylights. If your boondocking includes going off-road a lot, you'll also need a winch and a good folding shovel to dig you out of trouble. Ensure you have an adequate supply of prescribed medications on outings. Emergency preparedness includes personal protection, too, like a firearm, bear spray, a taser, and/or your favorite four-legged friend.
  
8. Apply the Golden Rule:

Be considerate of others and the environment when you boondock. Use only authorized roads and established campsites when required. Extinquish your campfire, pick up your trash, and leave your campsite pristine. Observe the law on the use firearms and hunting in the area where you're camping, and don't trailblaze--keep trucks, motorcycles and ATV's on established roads and trails. The best approach when boondocking is to simply leave your campsite in better condition than when you arrived. Taking care of our public lands is not only the right thing to do, it's also good for the environment. See Title 36 of the Code of Federal Regulations for additional information including fines.

I hope these principles and tips were a help to you, if you have any thoughts on the topic or perhaps some tips of your own I may have missed, please let me know here in the comments section. Thanks. 

Goodbye, Stinky Slinky! Hello, RhinoFLEX!

$
0
0

It was like a scene out of the Robin Williams comedy film, RV. We had just completed a big weekend camp-out with family and friends. Everyone had used our bathroom over the weekend, so the waste tanks in our camper were full, really full. I had already located a great dump site on Sanidumps.com and had made a beeline to it after leaving the campsite. I paid the fee, pulled up to the dump station, and got out to do the dirty business that all RV owners hate.

The afternoon temperature was 93 degrees, not exactly balmy, but tolerable. With the three-hour drive home ahead of us, I wanted to get this nasty business done and over with quick. I put on a set of disposable gloves, pulled out the Stinky Slinky sewer hose, and hooked it up to the camper's dump outlet. After inserting the other end of the hose into the dump station's sewer inlet, I walked back to the camper, reached into the dump valve access port, and yanked up on the handle to the black tank dump valve. A split second later the welcome sound of rushing water was heard as the sewage began draining into the sewer inlet. So far, so good.

Three or four minutes later the black tank was close to emptying out. At this point the flow rate had slowed down quite a bit, so I lifted the hose to help move the sewage along. I was in the middle of doing this when, to my horror, it happened--Mr. Slinky pulled loose from the bayonet fitting and flopped straight to the ground. With it a gallon or two of the nasty, foul smelling liquid hit the asphalt and splashed up on my legs and my feet. With sewage still pouring out of the dump outlet and a few choice words blurting out from my mouth (insert your choice of expletive here), I frantically grabbed the end of the hose and successfully reattached it to the bayonet fitting. Robin Williams would've been proud. But, alas, the damage was done. My ego was bruised and my shoes were soiled. Mr. Slinky had beaten me again.

Yep, this wasn't the first time. I had a similar run-in with this sinister hose back in 2010. In each case the point of failure was the bayonet fitting. The main problem is the bayonet fitting's design. The portion of the fitting that slips inside the Slinky is smooth. There's nothing for the hose clamp to grab onto when it's tightened over the fitting, so no matter how tight you get it the hose can pull away from the fitting with a good tug or twist. This is especially true when the hose is fully extended and full of waste water like it was for me during this latest mishap. I checked the tightness of the clamp before I used it this time around and it was snug as a rug, but it made no difference. A better solution than the troublesome, unreliable Stinky Slinky had to be out there and I was determined to find it.

Mr. Slinky before being relegated to the trash heap.

Fortunately, I did. The good folks at Camco make what they call the RhinoFLEX 15' Sewer Hose Kit, a patented RV dumping system with specially engineered hose fittings to prevent mishaps while dumping. The RhinoFLEX sewer hose is sold as a complete kit with everything you need to dump your RV's waste tanks. The kit includes a 15-ft hose, a swivel bayonet adapter, a 4-in-1 translucent elbow (yes, you can view the waste through the elbow while dumping), two locking rings, and two storage caps. The translucent elbow comes with a detachable adapter that fits all dump-station inlet sizes, including 3-inch slip or 3, 3-1/2 and 4-inch. Camco sells kits with hose lengths of 15 ft and 20 ft. The best price I could find online for the RhinoFLEX 15 ft version was $28.00 through Amazon.com.

When you first remove the RhinoFLEX hose from the box, it looks like your normal, everyday Stinky Slinky. Unlike the others, however, the RhinoFLEX hose "clicks" into the shape you want and remains rigid, meaning it can be extended or compressed like an accordion and can hold it's shape when bent like a drinking straw. No other sewer hose on the market can do this. For storage, the 15-foot-long hose compresses to an amazing 56-inches with the end fittings or 43-inches without them. Need additional length? No problem. Extension kits can be purchased in 5- and 10-ft lengths. Need a shorter hose for those extra short storage tubes like the one on my truck camper? Cut it to the length you need.

The RhinoFLEX end fittings are well-made and offer some neat, innovative features. The fittings are reverse threaded and are attached by rotating them onto the hose in a counterclockwise fashion. The locking rings, which are placed onto the hose first, are also threaded and are tightened by turning them clockwise until the locking tabs on the ring engage. Together, the two result in a hose connection that won't fail during use. Moreover, each fitting is designed so that they can swivel a full 360 degrees while connected, thus if any adjustments to the hose needs to be made while you're dumping you can do so confidently without mishap. I should note that the fittings come greased from the factory and that you'll need to grease them periodically to keep them limber and loose.

RhinoFLEX sewer hose (4-in-1 adapter & caps not shown).
Closeup of RhinoFLEX bayonet adapter with locking ring.
Plastic container where I store the 4-in-1 inlet adapter.

Are there any negatives with the system? I can think of only two. First, because of the size of the end fittings you'll need a storage tube with a 4-inch diameter to store it. Unfortunately, not all RV's have a storage tube with a diameter that large, so you'll need to either remove the fittings or find another place in your RV to store it. Second, the removable 4-in-1 inlet adapter is too bulky to fit in a standard 4-inch storage tube. This means you'll need to detach it from the translucent elbow and store it in another location. This can be a pain, for sure, but it is what it is (I store mine in a small plastic container with a lid). As you can see, neither issue is what I would call a "show stopper" and in no way detracts from what I think is an outstanding product.

How well does the RhinoFLEX actually work? I've been an RV'er for 12 years and the RhinoFLEX is simply the quickest, easiest, most sanitary dumping system I've ever used. The bayonet adapter attaches easily to my camper's dump outlet and stays firmly secured while in use. The hose is flexible, yet firm, and holds its shape no matter how much waste water is rushing through it; no need to place a large rock on the inlet side of the hose to keep in in place. The translucent elbow allows you to see the rate of flow at a glance and helps take the guesswork out of dumping. The hose is easy to clean and compress, while the storage caps make storing the RhinoFLEX a joy, no more messy spills while placing the hose in the storage tube. I can't say enough good things about the RhinoFLEX. My only regret is that I didn't buy one years ago. It works that well.

Now you may think it's lame for an experienced RV'er to get excited over a sewer hose. I can understand that. But the simple fact of the matter is that if you own an RV, waste tank dumping is an smelly, unfortunate fact of life that we must all do. Wouldn't you rather dump confidently each and every time without worrying about an embarrassing Robin Williams mishap? If you're still not convinced that the RhinoFLEX system is for you, check out the reviews on Amazon.com. Hundreds of testimonials have been written by RV owners stating that it's a superior product. So if you want a clean and reliable RV dumping system, and you're tired of Mr. Slinky getting the best of you, give the RhinoFLEX system a try. Your ego and your shoes will thank you.

Disclaimer: I'm an independent reviewer. I do NOT get paid to review products on this website. I will only recommend products which I use and believe in and which I think will benefit my audience. The views expressed are my personal views and are written without any influence, whatsoever. That said, I reserve the right to engage in paid affiliate marketing and promotion with brands, companies and individuals whose products I review. 

Ram 3500 & Wolf Creek 850N Specifications

$
0
0


I. 2013 Ram 3500 4x4 Short-Bed Pickup
GVWR: 11,700 lbs
Curbweight: 7,891 lbs (Official Payload: 3,809 lbs)
GAWR Front Axle: 6,000 lbs
GAWR Rear Axle: 7,000 lbs
Loaded with Camper (no passengers): 10,940 lbs (CAT Scale Readings)
Tires: Firestone Transforce 275/70R18E (weight capacity: 3,500 lbs)
Diesel Fuel Tank Capacity: 30 gallons
Alternator Output: 180 amps
Transmission: 68RFE
Cummins 6.7L TD: 370 lbs of torque @ 2,800 rpm
Weight of Cummins 6.7L TD: 1150 lbs
Front Axle: AAM 9.5 14-bolt, 35 spline, GAWR 6,000 lbs Max
Rear Axle: AAM 11.5 14-bolt, 30 spline (1.5-inch diameter), 3.42 diff., GAWR 10,120 lbs Max
Bed Length: 6 ft, 4 inches

II. 2011 Northwood Mfg. Wolf Creek 850N
Dry Weight: 2,008 lbs
Wet Weight: 2,328 lbs
Actual Weight loaded: about 3,100 lbs
Fresh Water Tank: 30 gallons
Gray Water Tank: 22 gallons
Black Water Tank: 20 gallons
Water Heater Tank: 6 gallons
Propane: Two 5 gallon tanks
Batteries: Two Lifeline 6 volt GPL-4CT Deep Cycle AGMs, 220 amp hours, 66 lbs ea.
Solar Power System: 240 watts, Morningstar Sunsaver 30 amps
Inverter: Morningstar Suresine 300
Total Length: 16 ft, 2 inches
Floor Length: 8 ft, 6 inches
Width: 8 ft
Mounted Height to Roof: 10 ft, 4 inches


Arizona Icon: The Mighty Saguaro

$
0
0
Known as the "Sentinel of the Desert," the magnificent Saguaro (pronounced Sah-wah-roh) is perhapsthe greatest icon of the great state of Arizona. If you've ever visited southern Arizona before, then you, no doubt, have seen thousands of these impressive looking Cacti growing wild in the desert. Indeed, any photographer worth his or her salt, has a least one photograph of an Arizona sunset with the outline of a Saguaro in it.

The Saguaro is found almost exclusively in the Sonoran Desert of Arizona and Mexico, though small numbers exist in California along the Arizona-California border. The plant is limited by elevation and can generally be found growing from sea level to about 4,000 ft in elevation. Any Saguaros found above that elevation are usually located on south facing slopes where the temperatures are much warmer. With distinctive, tree-like columns, the Saguaro is the largest cactus found in the United States. It's capable of achieving heights up to 60 ft and can weigh as much as 6 tons fully hydrated. At around 50-70 years, most Saguaros develop arms or branches, some producing as many as 25, although some never develop arms at all. In areas where there is very little precipitation, it may take 100 years before an arm appears.

The green skin of the Saguaro is very tough and possesses a waxy appearance. The skin is also pleated and sports protective spines clustered down the cactus' entire length. These pleats actually expand in the rainy season to allow the flesh of the cactus to soak up the water. Conversely, when the desert is dry, the pleats contract to use up this stored water. Since the majority of the Saguaro is made up of water, the plant is supported by a massive circular skeleton of inter-connected, wood-like ribs. These ribs are very decorative and highly sought after by landscapers once the plant dies and the flesh fully decays.

At about 35 years of age, the Saguaro produces beautiful white flowers (the state flower of Arizona) in late spring each year, which are pollinated by nectar feeding bats, birds, and insects. Once pollinated, they develop into a red delicious fruit in summer, each bearing about 2000 small black seeds. These seeds are propagated by bats and birds which eat the fruit then defaecate the tiny seedlings onto the ground. Only a few of these seeds actually germinate and grow to maturity. Baby Saguaros require the protective shade from what are called "nesting trees." These include not only trees, but also large bushes.

Saguaros are very slow growing. With adequate water, they typically grow about an inch a year. The average lifespan is believed to be between 150-175 years, though some can live as long as 200 years. It does require moisture, but not much, with the late summer monsoons providing most of its moisture needs. The Saguaro's root system is very shallow. Although the tap root extends down 2 ft, most of the its roots are typically only 4-6 inches deep and radiate as far as the cactus is tall. For this reason transplanted Saguaros have to be propped up with 2x4s until the root system takes hold.

Saguaros at Lost Dutchman State Park.
Saguaros at Usery Mountain Regional Park


Saguaros provide a natural habitat for several species of animals. The most conspicuous of these are the Gila Woodpecker and Gilden Flicker, both which create the large nesting holes seen in so many Sagauros. Each year the the stout beaks of the woodpecker and flicker drill out new nesting holes since the old ones are usually taken over by insects, lizards, and, occasionally, the pygmy owl. Large twig nests from the Harris Hawk and Red-Tailed Hawk can also be sometimes seen perched in the upper branches of Saguaros.

Although the Saguaro isn't currently listed as threatened or endangered, the state of Arizona has strict regulations about the harvesting, collection or destruction of this species. Stiff fines and penalties--$10,000 per plant-- will be imposed if you are ever caught illegally removing or relocating a Saguaro without a permit even if it's on your property. This even applies to property owners who want to relocate a cactus from one end of their property to the other. This may seem extreme at first, but with their very slow growth rate and their iconic status, these regulations are certainly understandable.

Interview with Off-Road and XTC Expert, Jeff Reynolds (Part I)

$
0
0
When it comes to Extreme Truck Campers (XTC's) and exploring off-road, few people know more than Jeffrey Reynolds. Known as Jefe 4x4 on the Internet forums, Jeff embarked on his first off-road adventure in 1965 and hasn't looked back since. He's owned a dozen 4x4 vehicles of various makes and has traveled well over a million miles in them. In the 1990s he worked as a staff writer on the Jeep section of Off-Road.com then later wrote articles for 4x4Wire.com about the nuts-and-bolts of 4x4 drive-trains. In 2001 he bought a Lance camper to go on his Dodge short-bed pickup truck and his whole world changed from rock crawling in Jeeps and other 4x4 vehicles to less extreme off-road exploring in a truck camper. Now at age 70, Jeff is in the "December" of life, but still shows no sign of letting up as he continues to explore exotic locales in the American west. 

Mike: Thanks again Jeff for taking the time to talk. How did you acquire the nickname, Jefe?

Jefe: The nickname, Jefe, pronounced Hay’-fay, which means the boss or chief in Spanish was pinned on me during my tenure as a bass trombonist with the Los Angeles Philharmonic (1969-2006).

Mike: Why is the name Cabeza de Vaca stenciled on the rear door of your camper? 

Jefe: Cabeza de Vaca is a mystical character and his family name is a double entendre. Firstly, I've read all the books about this itinerant explorer and his travels starting with his shipwreck on the west coast of  Florida during a hurricane, making his way through the later-to-be Gulf states and west to near the Pacific coast and south eventually to what is now Mexico City to be picked up and taken back to Spain in the early 1500's. This little ditty took him ten years, at which time he was forced into slavery a couple times by the now-extinct indian tribes; was naked half the time, and almost died of dehydration, starvation, sickness, flogging, over exposure, over and over again. I kind of identify with this guy. Secondly, a side shot of our truck camper gives a hint of a cow's head if you put eyebrows on the front-side windows.

Mike: How long have you been RV'ing?

Jefe: Since 1965. The definition of an RV is a vehicle with accoutrements for eating, and sleeping inside, with or without a bathroom space. In that regard, we camped in all the larger 4x4's, out of the weather, and mostly in very cramped mode. If your definition includes plumbed water, two showers, a wet bath, a dining area, a 3-way refrigerator, heat and a queen size bed, then the first year was 2001.

Mike: What truck camper do you presently own and why did you choose that make and model for your XTC?

Jefe: Once we had a car trailer to get my rock rig to the trail-head, then we thought about a small hard side truck camper to go along with it. I opened the Recycler and found a 1998 Lance Squire Lite 165-s. I called the guy. I looked at it. He used it three times. It chose me. I followed him to the bank and wrote a check. The whole thing went down on the same day. Just lucky I guess. My wife, Jeanie, and I have camped in it over 200 nights.

A 1965 shot of Jefe and his 1949 flat-fender Jeep wagon.
Jefe and his 1966 Toyota Land Cruiser.
Rock crawlin' in his 1982 CJ8 Jeep Scrambler.

Mike: Do you tie down and rig your Lance camper a certain way to take it off-road?

Jefe: Without a 3-point or 4-point truck camper attachment system on a flatbed, I have relied on "working" the four tie downs to be appropriate to the road surface. The frames on all pickup trucks are built to flex/tweak/rack. The truck bed will flex right along with it. This all depends on road surface and how twisted up you allow the axles. If you do not considerably loosen the rearmost tie-downs crawling over an undulating road surface, the twisting frame will try to pull your truck camper apart, little by little, by making the camper conform to the truck bed and frame twisting. Why the rearmost? In jacking the truck camper up above the truck bed for removal, I noticed most of the weight of the truck camper is on the forward jacks. Hmm? Little weight on the rear, at least on mine. I allow the rear of the truck camper frame to "float" and actually lift off the bed on one side or the other, trying not to conform to the twisting frame/bed, just follow the attitude of the front tie-downs. For off-roading, there is no room for camper jacks. They are just heavy outriggers ready to make contact with a slowly passing boulder. I remove them as soon as the camper is on the truck and leave them at home. Another issue I have pursued is to store nothing on the roof; all weighty items should be stored as low as possible. Potato chips, tea bags, and beer cozies; up high.

Mike: What measures do you take to prevent your Lance camper from shifting and sliding around in your truck bed?

Jefe: A thin, heavyweight bed mat and Lance camper brackets (aka centering guides) are a good start. I went through all the other permutations including; a fiberglass bed liner (huge mistake as the camper just skated around), a thick rubber mat (too spongy which increases your side-to-side sway) and nothing but the bed, which is pretty tough on the bottom of your truck camper. I tried without the brackets but the truck camper still would slide from side-to-side putting inordinate stress on the tie-downs, especially when you loosen the rear for axle twisting. There is only one way the camper can move now and that's rearward when the tie-downs are very loose. The Dodge has a footman's loop on each side outboard of the tailgate which could use a 1,000 pound strap to hold the box in the bed. I have had the camper try to make it's way out the back going up steep hills for miles but it doesn't get very far. The strap should contain the egress.

Jefe's 2001 Dodge 2500 and 1998 Lance Squire Lite 165-s.
Jefe's truck bed showing the rubber bed mat and brackets.
Jefe's "bovine deflecting" Warn winch bumper.

Mike: What modifications have you made to your truck camper and why did you decide against going solar?

Jefe: Solar power is very inviting, but with all those tree branches dragging on the aluminum roof and the weight of solar panels up high, I think I’ll pass for this lifetime. I purchased the model with no air conditioning, nor a built-in generator to keep the weight down. On off-season trips we take the Honda EU2000i on the off chance we need to run a house current device or charge batteries. I have some mods I’d like to make on the truck camper. I would like to loose both the front window and the pass through window as I find them useless and only there to transmit cold and heat, add weight and leak. If I had the 4-season insulation package, I would be happy as we are non-summer campers. In the end, I think I bought the right truck camper for us as there is very little I would change. You know, if it’s paid for, it fits your needs; and you are accustomed to and can work around its foibles, you might be a happy camper.

Mike: What pickup truck do you presently drive and why did you choose that make and model?

Jefe: I purchased my 2001 Dodge 2500 4x4 pickup truck brand new at the dawn of the diesel wars. I purchased it because it was the first year for a 35 spline, Dana 80 rear axle, the Cummins HO turbo diesel engine that used a bullet proof NV6500, 6-speed transmission, an NV241HD (wide chain to absorb the shock loading during snow plowing), disc brakes all around, and could run on third-world diesel fuel with pretty good mpg. No smog device. No soot bag. No urea canister. Not as simple as the first generation Cummins, but with a much more stout drive train. My choices had to do with tradeoffs. Notice my choice was focused on drive train strength and survivability, certainly not Dodge’s notoriously flimsy fit and finish. Oh, and it was the only truck engine and drive train that year in which I had any confidence about it outlasting me. So far, so good at 150,000 miles.
 
Climbing up the Colorado Engineer Pass 4x4 trail.
Another view of the Engineer Pass 4x4 trail.
Oh Point from Engineer Mountain in Colorado.

Mike: What off-road modifications have you made to your truck?

Jefe: If you choose your truck camper well, most of your mods will be to the truck. During the last decade I've made the following mods:
  • Steering box/frame brace. This cured the "wanderlust.
  • Warn 15000 lb Winch and Warn lightweight bovine deflecting bumper with 26,000 lb cement mixer "D" rings and front receiver hitch.
  • Power Lok rear limited slip (clutches under high preload)
  • Mickey Thompson super single or "Duplex" 33-inch tires/wheels on the rear axle. 375x55R16 on 12-inch wide forged aluminum wheels.
  • A 3-inch spring lift with 8 leaves on the rear and shocks.
  • Changed front 4-links to longer ones to locate the front axle 1-1/2 inches forward for more fender clearance for 34 inch tires and as a caster cure.
  • New Gen IV track bar (panhard rod).
  • Changed the dreaded Carter lift pump to a much-improved aftermarket fuel pump on the frame in front of the fuel tank, essentially making the pump a pusher not a sucker. This part was the Achilles Heel of the Gen II, Dodge Cummins. Installed a low fuel pressure idiot light to remind me there is still time to save the injector pump if I stop the engine.
  • Aftermarket air filter.
  • Added some tubing to the waste gate to make the turbo kick-in sooner.
  • New 4-inch exhaust system
  • New Spyntec "Shorty" complete hub conversion kit for the Dodge front Dana 60 axle. It has wide-spaced, larger Timken bearings, and from the outer U-joint outbound uses Dana 70 parts including the 35 spline stub shafts (that I am holding above in front of Cabeza de Vaca), and massive Dana 70 Mile Marker interior lockout hubs with a built-in tone ring. This kit replaces the wear prone and completely unserviceable Dodge Unit Bearing assembly. It works on Dana and American Axle Manufacturing (AAM) axles between 2000-2013. 
  • Class V receiver hitch
  • An aluminum cargo rack that will plug into the front or rear receiver hitch. It can hold extra yellow plastic fuel cans and boxes of goods including recovery gear.
Mike: Which engine type do you prefer, diesel or gas?

Jefe: At one time I did a lot of towing with the GCVW above 16,000 lbs. For big and heavy I like an oil burner. It's just more efficient than a gas engine. I’ve had many diesel cars (1964 MB200D, 1979 Cadillac Seville diesel, 1980 International Harvester Scout II Traveller Nissan TD, 1981 VW Dasher diesel, and 1983 Peugeot 505S TD) and I got used to the quirks of oil burners. If I were to buy another, say, 350/3500 that would only see occasionally use, I would look for a used Ford or Dodge V-10 gas platform. If you are not in it for the very long haul, or do not plan on much driving, the V-10 gas gets the job done without the $5,000-10,000 diesel penalty. 

Part two of this fascinating and informative interview with Jefe can be found by clicking here.

Interview with Off-Road and XTC Expert, Jeff Reynolds (Part II)

$
0
0
This is the final installment of my two-part interview with off-road and extreme truck camper expert, Jeff Reynolds (aka Jefe 4x4). Part one of this fascinating and informative interview can be found by clicking here. 

Mike: What tires do you have on your truck and what inflation values do you typically run when driving off-road? 

Jefe: I’m a rolling anomaly with super singles. It was a good solution for me. The rears are Mickey Thompson 33x15.50R16’s with a very wide AT tread. They are not made anymore. The fronts are Mickey Thompson 33x13.50R16’s on stock rims. I also have 33x14.50’s on 10-inch wide rims that will fit in front if I’m running the dunes (and also as one of my two spares I must carry) and they are all the same diameter. With the truck camper on, I always keep the tire inflation at the upper limit as printed on the sidewall, either 65-pounds, or 80-pounds, depending. On rough dirt roads I like to feather down the pressure to 32-pounds, front, and 30-pounds rear. Why that discrepancy? The wider and more voluminous the tire, the less pressure it needs to carry the load; it’s just physics. While on blow sand, or the dunes, I’ll take the fronts down to 22-pounds, and the rears down to 20-pounds for the maximum floatation my setup will produce. It's really strange to see that 10,000 lb white elephant shooting the dunes and still upright and still moving and not sinking up to its eyeballs. My next experiment with tires and wheels is a military surplus tire dealer nearby with hundreds of HumVee wheels and super single tires, 34-inches tall, 9-inches wide, 8-inch lug, and 7-inch backspacing beadlock wheels. I will report back how that goes. 

Mike: What are your thoughts on the dually (DRW) as an off-road vehicle? 

Jefe: A dual rear wheel truck makes little sense on narrow trails. It can be done, and I have seen it done, but you must drive much slower and weave your way through taking lines you would not think worthwhile with a single rear wheel truck. With my 15.5-inch-wide rear tires and 12-inch wide rims the rear axle has about a 6-inch narrower track than a truck with duals. Even then I don't quite fit on seldom used two tracks and if it is very rocky, big chunks of tread go missing out of the outer edge of the tire over time. That time has come. Taking a cue from military trucks, I'm thinking 9-inch wide combat steel rims with 10-inch wide, 34-inch tall super single tires on all four corners would be a fine compromise between on-road worthiness and floatation for soft terrain, even for folks currently with duals. All those up-armored HumVee's are equipped for on-and-off-road situations. There is one important distinction here: backspacing. The HumVee wheels have an 8-on-6.5-inch lug pattern, can be had with beadlocks, and more importantly a 7-inch backspacing which keeps the tire centered over the wheel bearings, not slung way out on the spindle like a wheel with a 4.5-inch backspacing. 

Mike: What advice would you offer to those who experience excessive sway when hauling a truck camper? 

Jefe: Sway is hard to pin down. Conventional wisdom recommends using a thick anti-sway bar on the rear axle. However, the very application that makes it work on-road is a liability, off-road. Recoil or rebound is the culprit. I remove the bolt on one side only on the anti-sway bar to allow the suspension to flex more, just like jeepers release the anti-sway bar when going off-road. Leaf springs have less recoil than coils or air bags. You will get more sway with coils and air bags. Stiff gas-charged shocks will help mollify the recoil. If you have secondaries, apply something in the space between the secondaries and the main pack to apply the extra spring loading sooner. I’ve had success with Stable Loads. If you still have sway, off-and-on road, there is too much weight up high. Maybe that air conditioner, or set of clubs, or the X-Cargo, or those three kayaks? This is one case where you need to "worry your way" through the sway minefield to serenity, a step at a time. 
 
Comparative pic of Jefe's Mickey Thompson Super Singles.

Jefe and friends negotiating a steep and winding trail.
On the White Rim Trail, Canyonlands, UT

Mike: What tools and recovery gear do you consider essential when going off-road? 

Jefe: The idea is to get to terra incognita and back to civilization without external support. Maybe I take too much recovery equipment. Having made hundreds of winch pulls I just add stuff to my self-recovery arsenal whether I just used it once or hundreds of times. It's basically the same gear that I take rock crawling, but on steroids to pull that 10,000 lb beast out of trouble. And I have been stuck in that thing. Besides the front winch and enough recovery attachment points fore and aft, I take:
  • A 20 foot, 4-inch nylon recovery strap with loop ends.
  • A short, 4-inch wide nylon tree saver with loop ends.
  • Four "D" rings: medium and large.
  • A ½ inch Cat Choker (logging).
  • A 5-inch hook with clevis.
  • A short piece of coiled ½ inch wire rope with clipped hooks.
  • A 20-pound CO2 bottle with hose/attachments for filling tires.
  • Four manual, screw-on tire deflators.
  • A snatch block.
  • Several, high quality tire gauges.
  • A small bag with tire repair parts like stems, valve cores, caps, and extensions.
  • A Safety Seal Pro Tire Repair Kit. Comes with 30 glue-laden plugs that look like caterpillars.
  • A small, high quality, fold-up shovel.
  • A 12-ton bottle jack that will fit under an axle with either side’s tire flat.
  • A 4-foot breaker bar.
  • A few 10,000 lb. ratchet straps and some 1,000 lb ratchet straps. I’m always taken by how many ways these come in handy when all else fails. They’re kind of truck camper duct tape.
  • A 1-foot square jack board. (two ¾-inch pieces plywood glued and screwed together as a base.
  • A dozen leveling blocks to keep the ammonia transfer fridge happy.
  • A thin foam camping pad to lay or kneel on when working underneath or use when changing a tire in the mud or when installing chains on an icy day.
  • Enough tools, but not the kitchen sink.
  • I do not take a high lift jack. I have a 60-inch high lift and it’s very useful around the ranch and during rock crawling, but for it’s weight and bulk, it has very limited use with a camper on a truck. No rope or chain. The need for sand ladders or mats seems like a lack of floatation to me.
Mike: What are your favorite trails and roads? 

Jefe: It’s seasonal. In the Fall I like to roam around the Sonora Pass area of the Sierra-Nevadas and one range to the south east in the Inyos. In the past we enjoyed early summer trips to Monache Meadows, Rockhouse Basin, (now closed to motor vehicles) along the Kern River Plateau’s upper reaches. We enjoy the whole area within 300 miles of Moab, Utah. We’ve done the high passes in the San Juans many times with different machines. Magical place. There are several beaches along the Pacific Coast that allow vehicles. They are all gems. The granddaddy of all truck camper excursions is a trip to Alaska, from wherever. We did the 32 day, 9,000 mile round trip in 2003, traveling on 2,500 miles of dirt and gravel byways, camping on sandbars and in gravel pits above the Arctic Circle. 

Jefe and Cabeza de Vaca in the middle of Soda Dry Lake.
Passing through standing water on the Mojave 4x4 Road.
Jefe, 3rd from Left, relaxing with family and friends.

Mike: Do you have a favorite state where you like to explore? 

Jefe: Not really. The entire western U.S. and Canada west of The Rockies and all through Alaska are wonderful with a truck camper. Nevada is probably the most truck camper friendly state, as there are no trees to slither by, and it’s remote almost everywhere. But, you had better like desert. Over my lifetime, The Visciano Desert in Baja California del Sur is the most remote place I’ve ever been in an RV. 

Mike:What advice would you offer to those who are considering buying an XTC to take off-road? 

Jefe: Mass and weight and how high up that weight is placed are the main issues here. I always advise one buy more truck and less camper than you think you can get away with. This gives you the best chance to be far from the brink. The best truck camper for serious off-roading is a pop-up on a tray or pivoting frame short bed flatbed. The XP Camper comes to mind. I have no relationship with XP even though I live about a mile from the owner and founder. For a little less serious off-roading (the kind I do) or if you're planning on traveling for months on end during the winter, the lightest aluminum frame, less tall, less wide, hard-side truck camper will be a comfort at 20 degrees in a blinding snow or sleeping through 80 mph winds. 

Mike: If you were to buy a brand new truck camper, what make and model would it be? 

Jefe: Two come to mind. First, the XPCamper. Still state of the art with tried-and-true technology. But at $70,000 per pop, it’s not in the state of my budget. For that price, you do get the 3-point, floating tray flat bed. Time will tell for Jeanie and I whether one of these is in our future. Second, the Lance 865. Much less costly and has all the most up-to-date components and can be ordered with the 4-season package with block insulation and double pane windows. It’s a winner compared to other similarly equipped, higher priced truck campers. The biggest difference is in the weight: smaller tanks and no basement. 

Mike: I understand that your Lance has only an 18 gallon fresh water holding tank. What do you do about fresh water while boondocking?

Jefe: I try to tailor the amount and type of water I take into the boondocks for each projected trip. I take two types of water: drinking/cooking water, and water I would only drink if I had to. With only an 18 gallon fresh water tank one must get creative on how much and where to store and transfer on-board water. We always carry 24 or more, 16 oz. drinking water bottles stored behind those little doors near the floor that lead to the space in front of the wheel wells: not very convenient, but the weight is down low. For short (3-6 day) trips we always put our general use fresh well water into the 18 gallon tank and fill the sturdy white liter and heavy duty blue one gallon plastic water bottles to store in a low cabinet at the rear near the door. They fit like a puzzle in there and that's by design as the jostling has split many worthless-for-TC'ing milk gallon containers during transit. There is a lot of weight in there and the door catch kept popping open until I added an exterior latch. The next echelon of priority for longer trips or with more bodies to water is to add two, 2-1/2 gallon plastic water jugs. If this is not enough, we add a 5 gallon plastic water jug. By now the jugs are getting too heavy to lift up to the water spout on the truck camper. If a next step is needed, we tow the jeep trailer and fill a leftover earthquake preparedness 25 gallon water jug on the trailer and must use a small drill driver and long hose to pump it into the truck camper. This is really a hassle and the option is not used very much. 

Jefe climbing Murphy Hogsback, Canyonlands, UT
Negotiating a rough patch on the Mojave 4x4 Road.
Boondocking in the lower Sierra-Nevadas.

Mike: What foods do you like to eat when you're out exploring in your Lance camper? 

Jefe: I'm not in charge of food. Luckily I am married to a wonderfully creative cook. Jeanie should have her own TV cooking show on how to make something out of nothing. She is Queen Leftova. Our first night is usually tacos with all the trimmings using already cooked meat in sauce/frozen in time and unveiled at camp. It’s always a winner. All our meats from home start out frozen and marinated. Another favorite is grilled carne asada with tortillas and homemade salsa. Chicken Baja is another favorite. It’s a pattern we’ve developed on the road over the decades. We usually only carry a week’s worth of food onboard with Jeanie slowly working this or that into the menu. We shop for food like the French do: a little at a time and just enough for a day or so, unless we are way out there. It’s a miracle. I do most of the grilling outside on the Weber. She knows what to expect; how to pack; how to get the most food value out of the least weight and bulk. Some of the greatest tasting meals in my lifetime were out of the TC, in the woods or out in the desert at sundown. Jeanie has a habit of mixing her “Tequilla Sunset” as an aperitif at happy hour. Just remember, no matter what time of day you consume said beverage…the sun goes down. 

Mike: Do you have any other hobbies as they relate to the great outdoors? 

Jefe: Well, of course hard-core jeeping has been a focus for decades and is only now fading. I’m a big fan of Western U.S. History and the little 3-foot narrow gauge railroads that plied the San Juan Mountains in Colorado. I never met a roadside historical plaque that I didn’t want to stop and read. We are set up to do a fair amount of birding. When the time is right, our next big adventure will be Vagabonding around the U.S., off-season in the truck camper for 12-16 weeks. 

Mike: This has been great talking to you. Thanks again for taking the time to talk with me. Do you have any final advice?

Jefe: Follow your star. Do what you love doing. Do that at which you are good. Truck camping is one of the few things left that I love to do, down Jefe’s road to XTC.

Truck Camper 6-Pin Umbilical Wiring

$
0
0
In order for a truck camper to be street legal it must have an electrical interface with the truck's running, stop, turn signal, and backup electrical circuits. This electrical interface also includes a 12 volt "hot" lead to charge a camper's batteries while the truck's alternator is running, and, of course, an electrical ground. While today's trucks use the industry standard 7-pin wiring and 7-pin connector, only six of the seven pins are used in truck camper applications since the brake line isn't needed. If you happen to have an older, vintage pickup truck, you'll need to consult the documentation that came with your truck to determine the correct pin-outs, or you'll have to do it manually with a voltmeter.

The electrical interface between the truck and camper is often referred to as either the umbilical or "pigtail." This pigtail consists of a round 7-pin flat bladed connector on the truck side and proprietary 6-pin rectangular connector for the truck camper side. This 6-pin rectangular connector can be found on all Northwood Manufacturing Arctic Fox and Wolf Creek truck campers. You'll notice that the ground wire on this connector uses a male fitting while the other five are female connections. This is done to prevent the 6-pin plug from being inserted upside down into the 6-pin receptacle. With the exception of the charge and ground wires, Northwood Manufacturing uses 14-AWG wiring inside their campers and in the pigtail. For the charge and ground wires, Northwood Manufacturing uses 10-AWG wiring to facilitate a better charge.


If you own a truck camper from another manufacturer the 6-pin receptacle will probably look a lot different than the 6-pin rectangular receptacle used by Northwood Manufacturing. I know that Lance uses a smaller, round receptacle as do several others. Because of these differences you won't find a standard, factory sealed pigtail when you take delivery of your truck camper. Instead, you'll receive a wiring harness with a matching plug for your camper that must be completed on the other end with a 7-pin plug. The dealership that sold you your camper will finish making this umbilical for you. Make sure that all lights and the charge lines are fully tested during your dealership PDI.


Maintaining the electrical contacts in your receptacles and umbilical plugs isn't too difficult. I like to use WD-40 Electrical Contact Cleaner to clean the electrical contacts, followed up with a light brushing using a small, round metal brush. Once that's done, I like to apply a thin coat of Di-Electric Grease to all the receptacle and plug contacts to protect them from the elements. As for the length of the pigtail, that varies. It really depends on where your truck's 7-way receptacle is located. My pigtail is approximately 6 ft long.

Mello Mike's Truck Camper 101

$
0
0
If you're reading this article you're probably either a new truck camper owner or a person who is seriously thinking about buying one. Whatever your situation, it's a great move. The truck and truck camper combination is easy to drive, offers better fuel economy, is extremely versatile, and can be taken far off the beaten path. The truck camper is also easy to store and maintain, and in most states doesn't require annual registration and title fees. But with no running gear, the truck camper is also the most unique RV in today's market. This means you'll need to buy the right pickup truck and buy the right truck camper equipment to safely haul it. This article addresses these and a host of other truck camper related topics to help make your transition to the truck camper world smoother and less difficult. 

I. Choosing the Right Truck

Payload, payload, payload! When it comes to hauling a truck camper, nothing is more important than this number. The payload of a truck is simply the amount of weight that the truck can carry and is a product of the truck's Gross Vehicle Weight Rating (GVWR). The payload, expressed in both pounds and kilograms, can either be found on a driver's side door pillar placard or in the glove box on a payload certification form. You can also determine the payload by subtracting the curb weight of your truck (you'll need to take it to the scales to get this figure) from the truck's GVWR. Basically, everything being carried in your truck, including all passengers, gear, and your "wet," fully loaded truck camper, should be below your truck's rated payload. Grossly exceeding the payload and GVWR is neither safe for your passengers nor for others who are sharing the road with you. And if you happen to get in an accident while overloaded, your insurance company can void out your coverage.

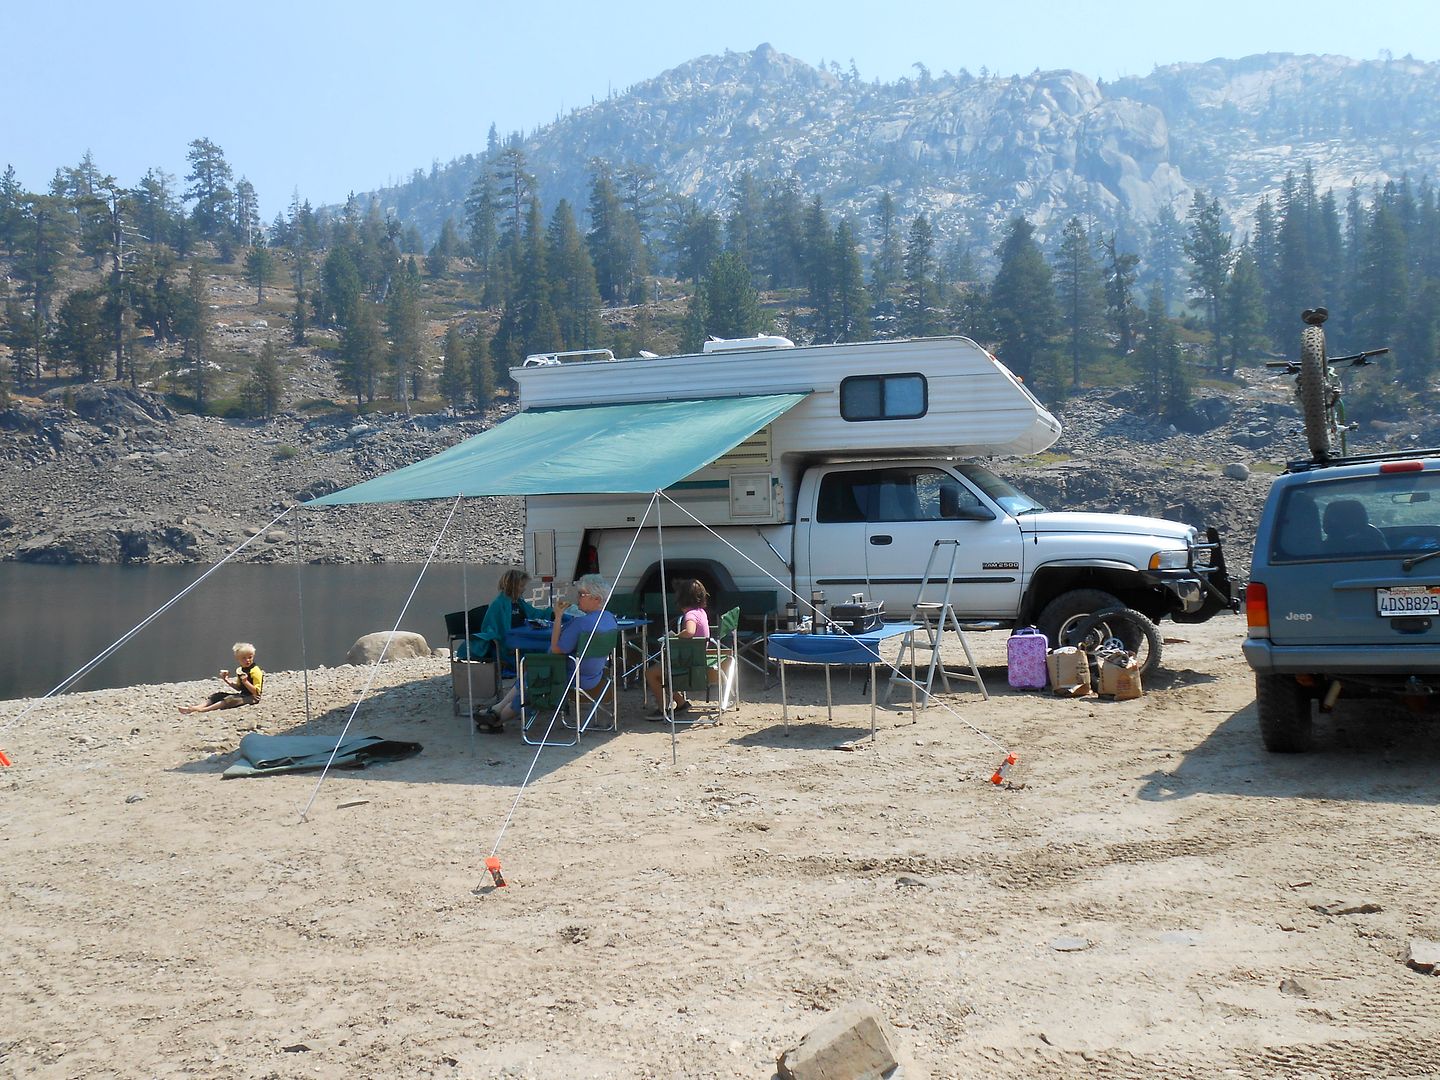
Choose wisely when buying your truck. Buy a one-ton.

Another important rating when it comes to hauling a truck camper is the Gross Axle Weight Rating (GAWR). Each axle has an assigned GAWR, but the most important of the two is the rear since it will be bearing most of your cargo's weight. You can find these ratings by looking at the aforementioned axle and tire rating sticker or by looking at the truck's payload certification form. If you closely examine these ratings you should see an increase over the GVWR when totaling them. This increase can vary anywhere between from 100 to 1,000 lbs per axle. Exceeding the payload rating of a truck isn't advisable, but these ratings can be used to squeeze out extra pounds of cargo carrying capacity. One should never exceed the GAWR of your axles. The same applies to the weight ratings of your tires (more about that later).

Remember when the terms half-ton, three-quarter-ton, and a one-ton accurately represented the payload for each class of pickup truck? Well, those days are long gone with all three classes of truck capable of hauling much more weight. Today's three-quarter ton trucks have payloads between 2,300 and 3,800 lbs while one-tons can haul anywhere between 3,800 and 6,200 lbs. The large variances in each class are due to bed-size and options so they must be carefully chosen. For example, the 6.7L Ford Powerstroke diesel weighs 1,100 lbs wet compared to their 6.2L V8 gas engine which weighs in nearly half that at 600 lbs. And if you're considering a four-wheel drive transmission, that's another 400 lbs. The same applies to other nice-to-have options like steel wheels, a crew-cab, a super hitch and a winch; all of these add capability, but reduce payload. So choose your options wisely.

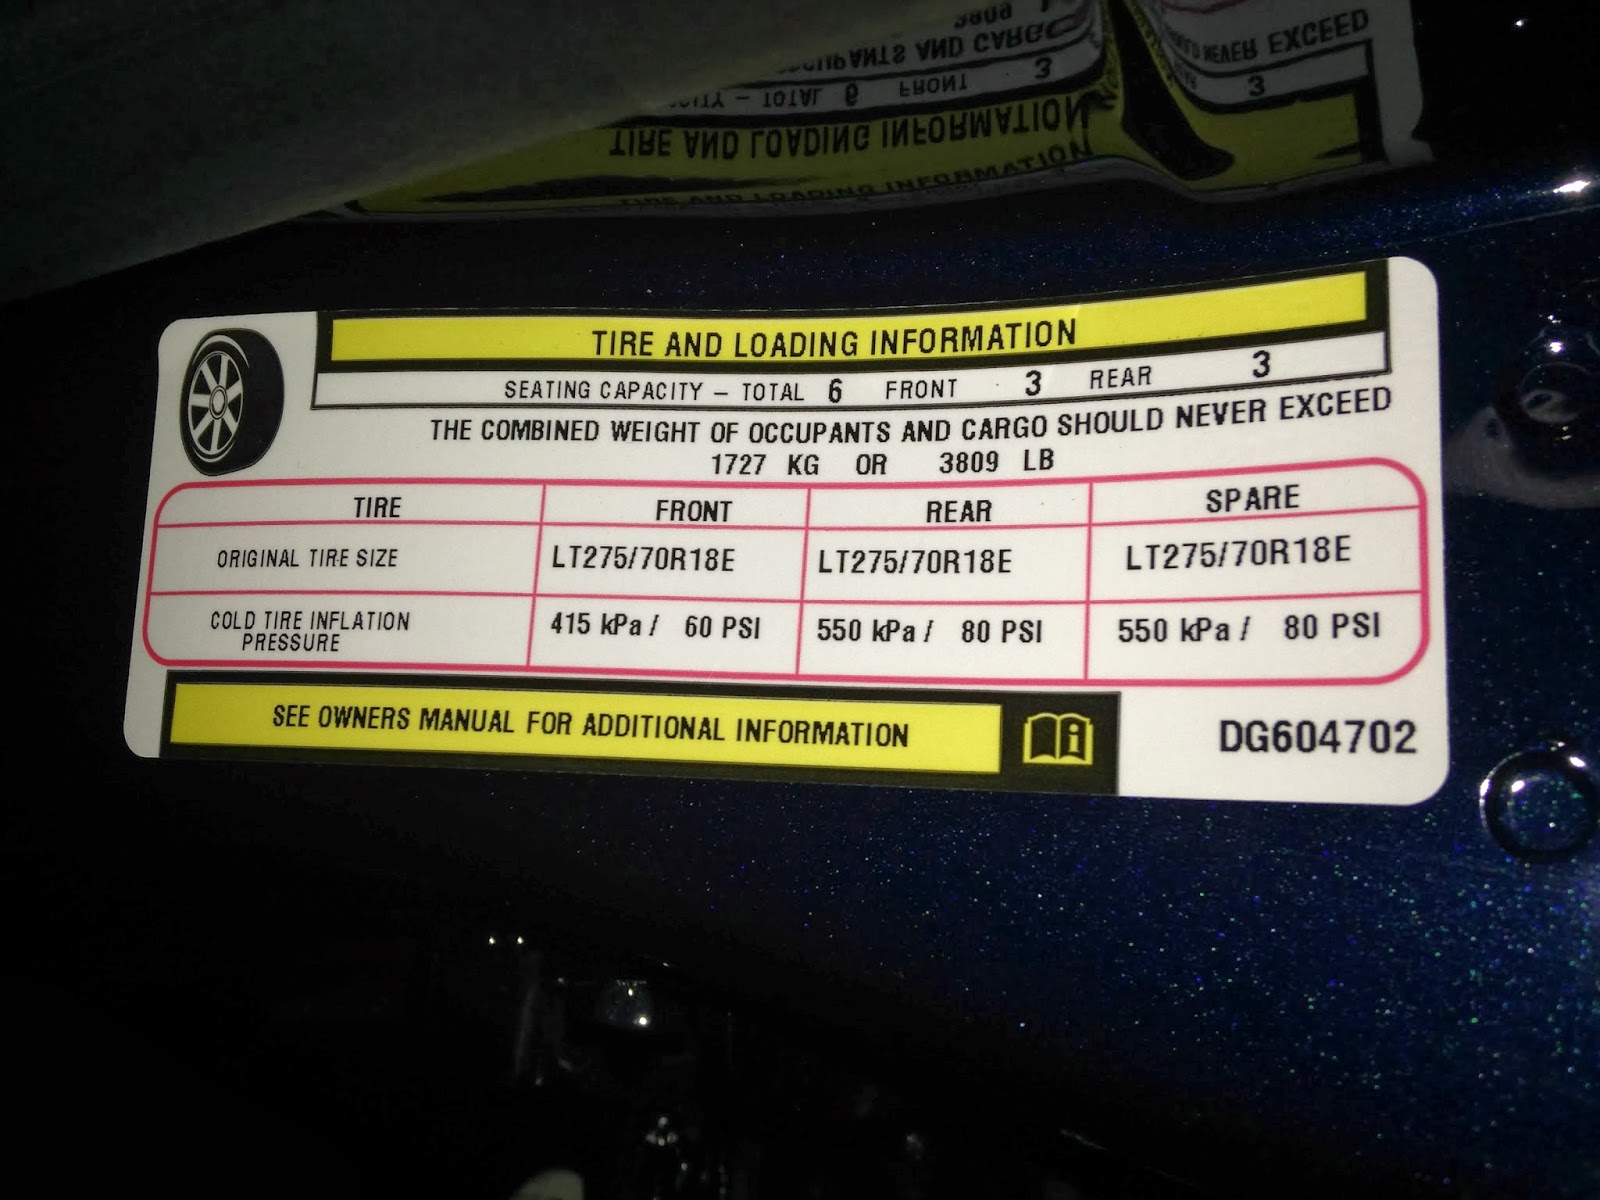
The official payload for this particular Ram 3500 is 3,809 lbs.

When it comes to options perhaps the most often debated is whether to buy a truck with either Dual Rear Wheels (DRW) or Single Rear Wheels (SRW). Both certainly have their pros and cons. Dually's offer superior stability and handling on roads and usually offer much higher payloads, but they are also wider in the "hips" and less adept at off-roading. It's true that DRW's "float" better over certain surfaces like loose sand, but the big negative with them is that jagged rocks can get wedged in between the rear wheels causing flats and other damage. On the other hand, SRW trucks are narrower, lighter, more versatile, and provide superior traction and maneuverability on all types of road surfaces. Basically, where you intend on taking your truck camper plays a big role in what type of rear end to get. If you intend on staying on the asphalt with a heavy camper, then the DRW is the way to go. If you intend on doing a lot of off-roading with a light camper, then I'd go with the SRW.

The diesel engine is another hotly debated option. With the high cost of diesel at the pump and with today's strict EPA standards you'd think the diesel would be dead in today's auto and light truck market, yet it hasn't happened and probably never will. Diesels still provide superior torque, better fuel mileage, and last longer than the typical gas engine (600,000 miles is not uncommon). They also hold their value better and have a "coolness" factor associated with them that a gas engine can't touch. Yes, it's true that the new requirement for Diesel Exhaust Fluid (DEF) adds an additional burden for diesel ownership, but there's also no denying that today's diesel engine burns cleaner, is much quieter, and and doesn't have the smell associated with them that they had in the past. The big negative, of course, is the payload loss associated with the heavier engine (diesel engines typically weigh 600 lbs more than a gas engine), so this must be carefully weighed against the positives and your own specific needs. Because of this I wouldn't recommend a diesel for anything less than a one-ton truck.

So is the half-ton pickup truck suitable for hauling a truck camper? Yes, but with several caveats. It really depends on the truck's rated payload and the size and weight of the camper you have in mind. The 2012 Ford Heavy Duty F-150 long-bed (145 inch wheelbase), regular cab, 4x2 has a rated payload of 3,120 lbs. That's a pretty impressive amount of weight no matter how you slice it and dice it. Short-bed (6.5 ft) and mini short-bed (5.5 ft) models are much more limited than long-bed models due to their small payload (generally less than 1,900 lbs). This reduced payload basically limits you to pop-up truck campers and smaller hard-slide campers for short-bed trucks, and pop-up truck campers for the minis. With the exception of heavy duty models, short-bed half-tons will most likely require upgrades to the shocks, spring pack, and tires, the latter meaning an improvement to Load Range E tires.

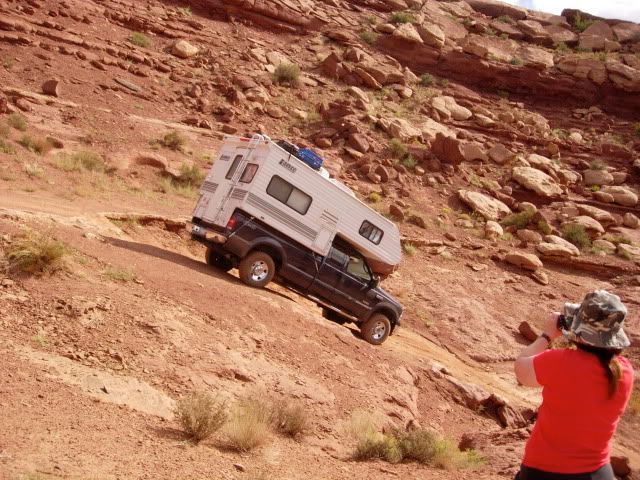
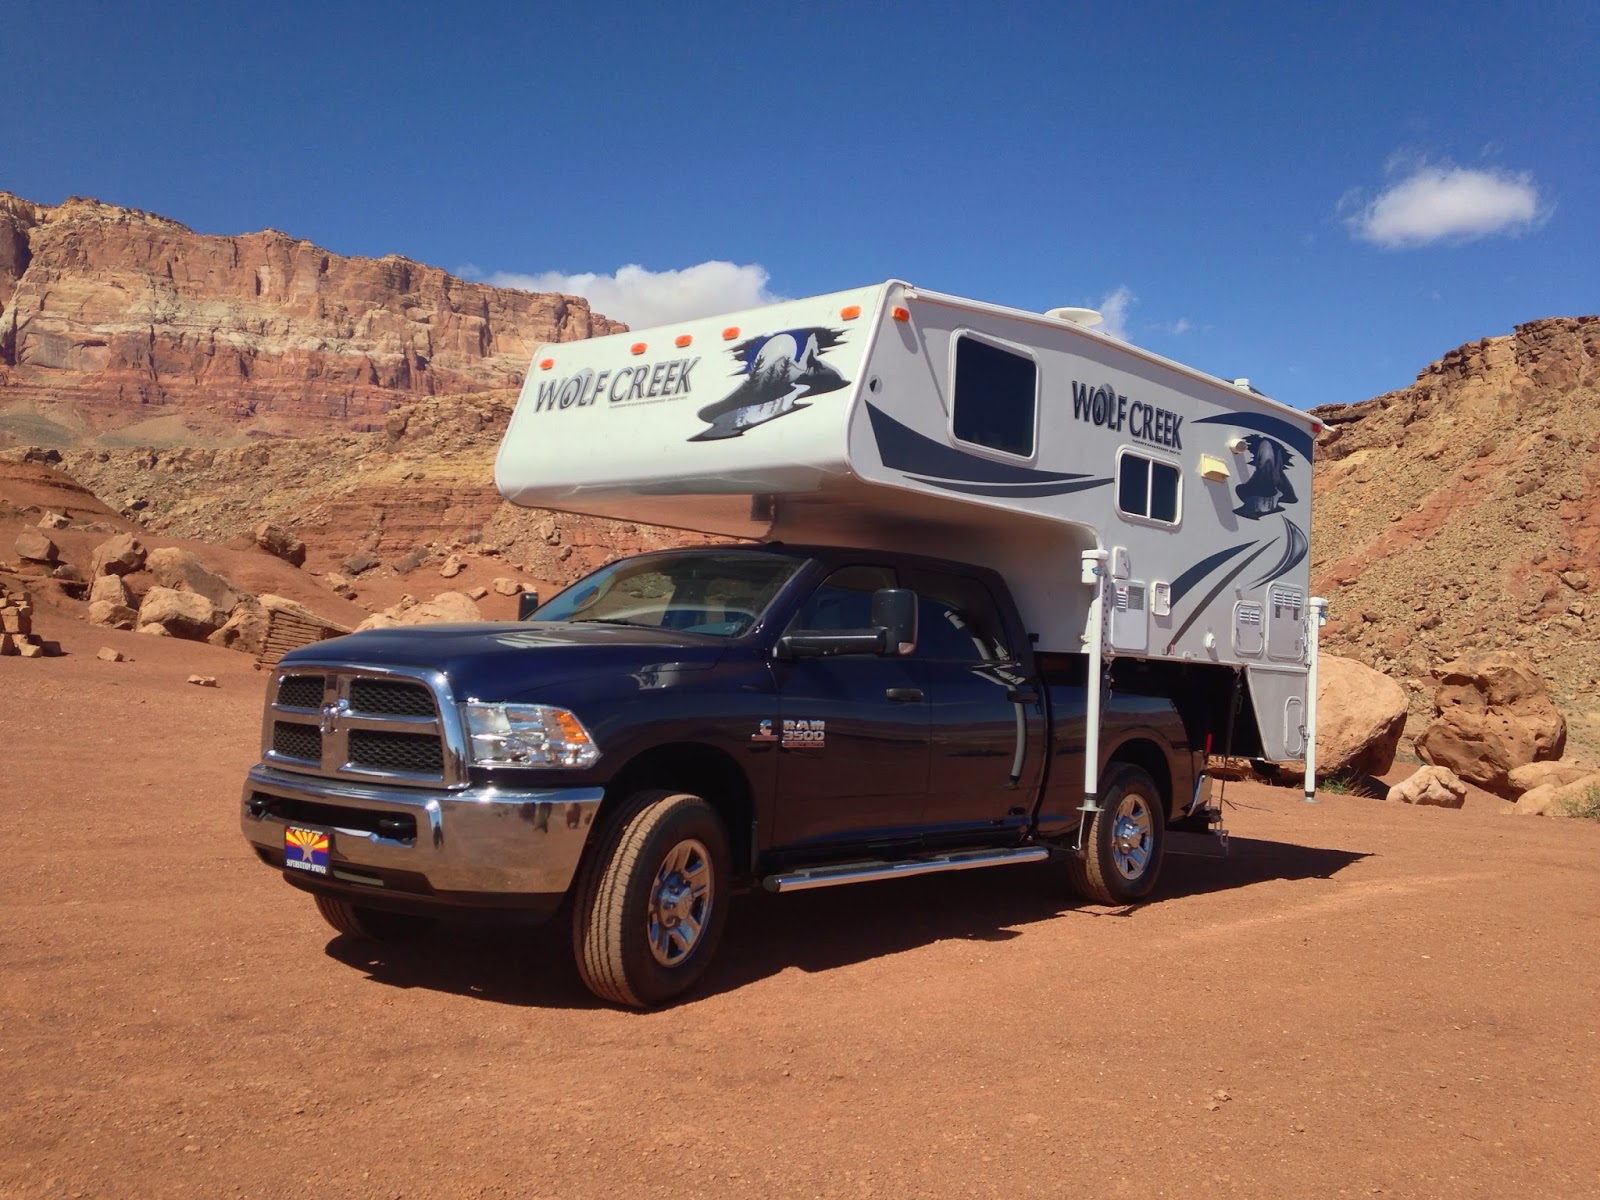
II. Choosing the Right Truck Camper

If you're starting from scratch and have neither a truck nor a camper, it's best to choose your camper first. This will save you angst and money in the long run. Today's consumer has much to choose from when it comes to buying a truck camper. Truck campers come in various sizes and styles including long bed and short bed, hard side and pop-up, and slide-out and non slide-out models. Like any RV, you'll want to buy the camper that meets your requirements as far as size and features are concerned.  You'll also want to buy one that will allow you to go where you want. If you plan on doing a lot of boondocking and off-roading then you should look hard at a pop-up truck camper. These are lighter, have a lower profile, and have a lower center of gravity for tackling the most challenging roads and terrain. If your travel plans are less ambitious, however, and you desire more security and a more capable four-season camper, then the hard-side truck camper will probably suit you better. That isn't to say, you can't do a lot of off-roading in a hard side truck camper. You can. But if you decide to go this route I recommend a non-basement model, with a low center of gravity, and a width of no more than 7.5 ft. 

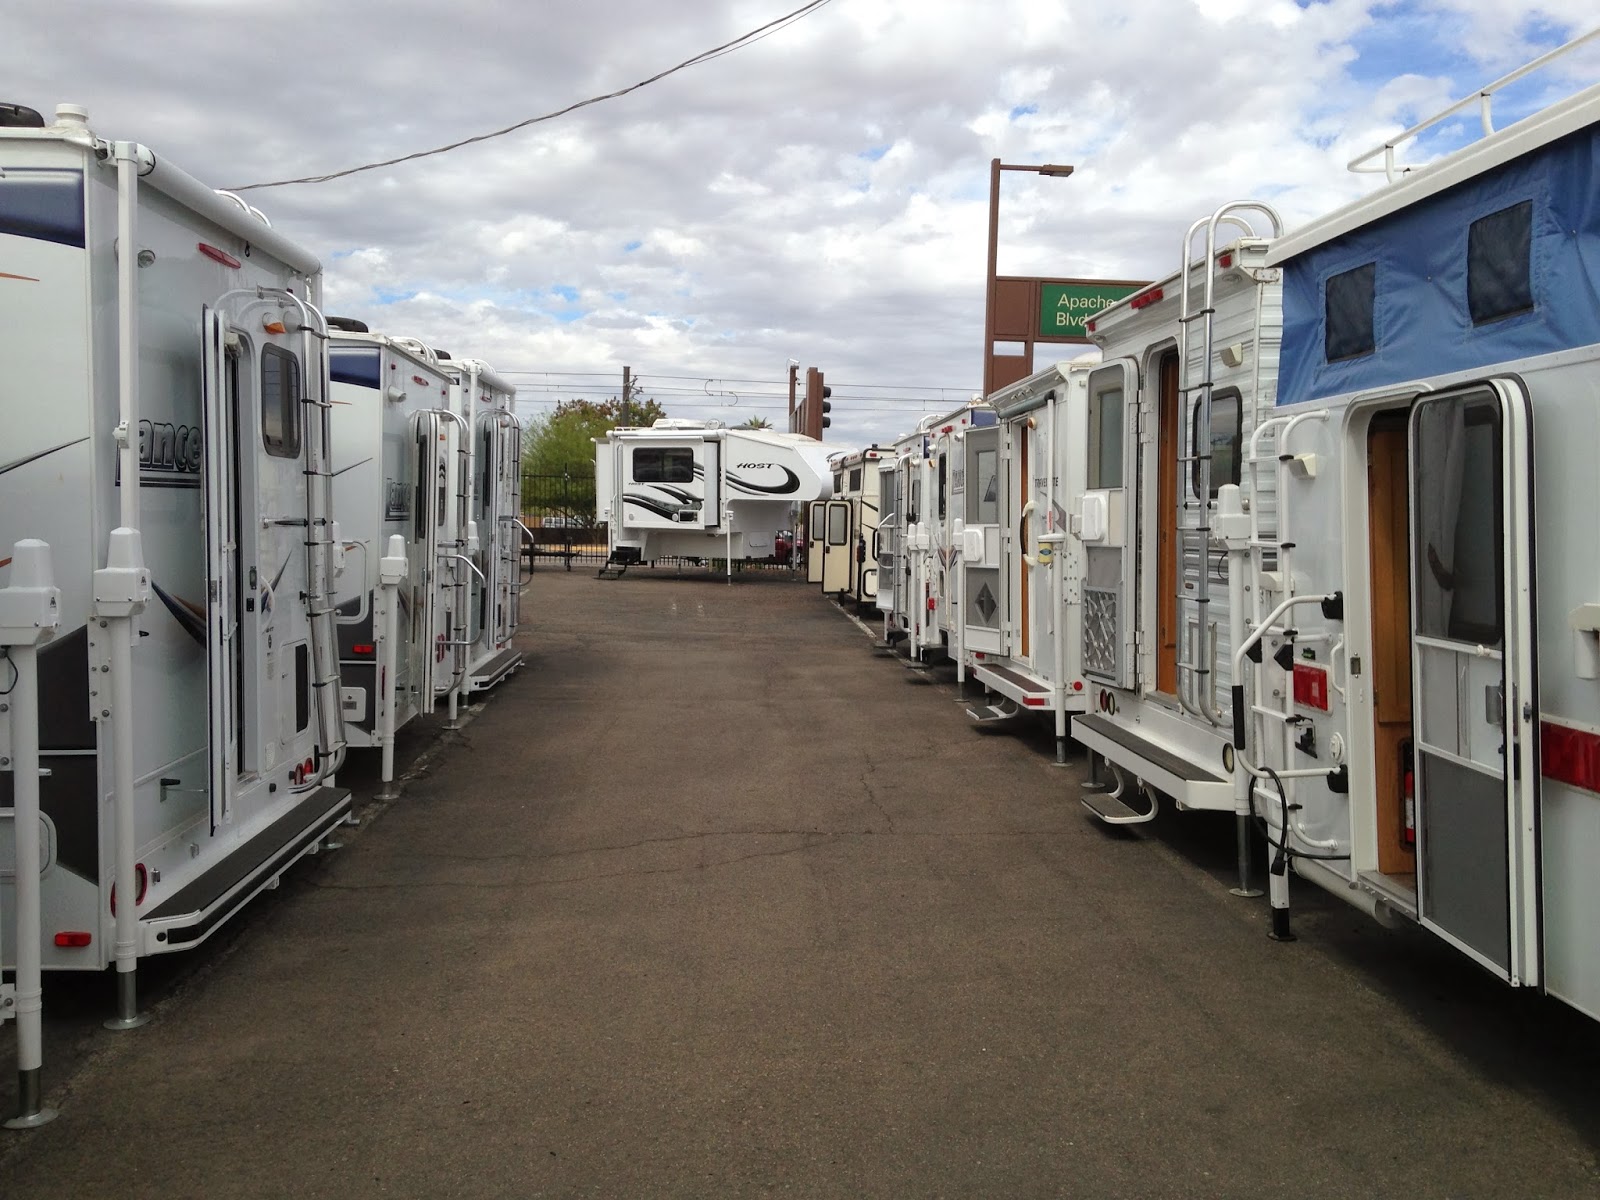
Today's truck camper consumer is blessed with many choices.

When it comes to truck campers, weight is a very important consideration, if not the most important. Manufacturers list the unloaded "dry" and the fully loaded "wet" weights of their campers on their websites and brochures, but these figures can be deceiving. These numbers don't include installed options, like air conditioners, and never include things like food, clothing, cookware, utensils, and camping gear. Never buy a truck camper based upon the manufacturer weights alone. To give you a better idea of what the camper will actually weigh when you use it add 1,000 lbs to the camper's listed wet weight. This often-used rule of thumb works surprisingly well for truck camper owners and has proven to be pretty accurate when going to scales. Obviously, you'll want to ensure that the truck you choose has a payload rating higher than this more realistic camper weight figure.

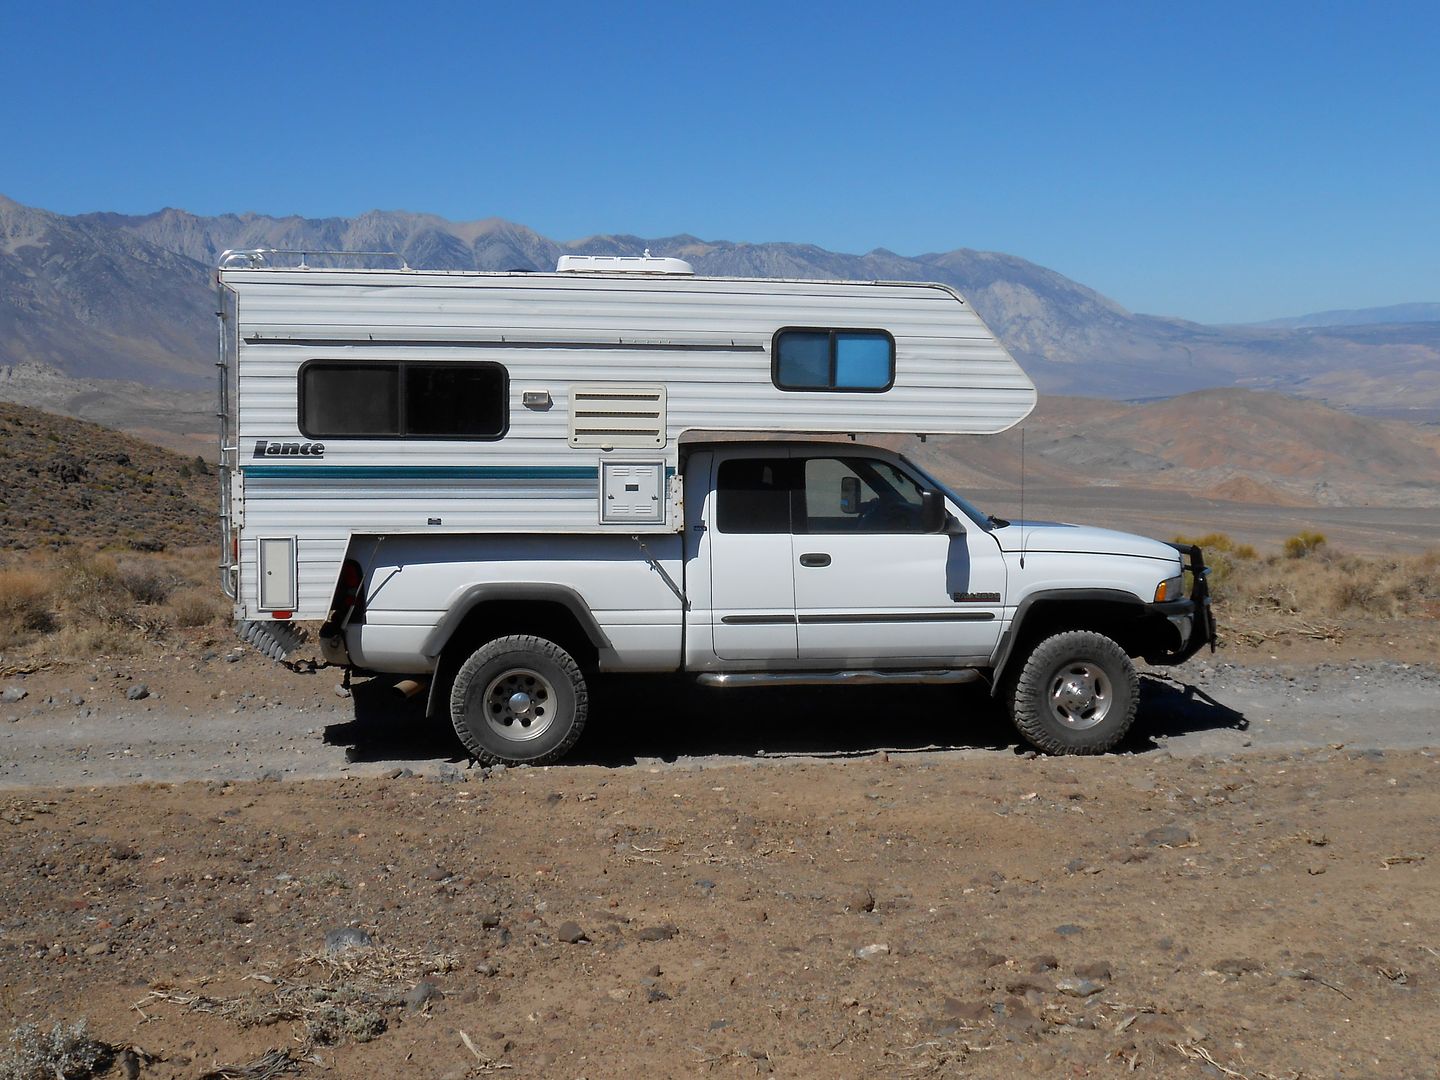
An often overlooked factor when choosing a truck camper is how it's constructed. Aluminum framing is used by most truck camper manufacturers today, but there are several that still produce wood framed units. There are pros and cons to each. Aluminum is lighter, doesn't rot, and is mold and termite resistant, but it also more expensive, is subject to more thermal loss, and requires proper welds for the structure to hold up over time. On the other hand, wood is stronger, cheaper, easier to work with and repair, and insulates better, but is also heavier, can rot and mold over time if exposed to moisture. Wood also flexes better than aluminum. It's for this reason that some manufacturers that specialize in off-road campers--like Four-Wheel, Phoenix, and Northstar--use wood rather than aluminum for their frames.

Should you buy a truck camper with one or more slide-outs? That's a personal choice. There are certainly some big positives with slide-outs, the most important being the extra space and roominess they create, but they're also heavy, tacking on an average of 400 lbs to the weight of the camper. Slide-outs can also leak, create drafts when extended (a major consideration for those who like to camp in the winter), and can breakdown. Like anything it really comes down to what's important to you. If you think you'll need the extra space that the slide-out provides and you think you'll camp mostly on well-maintained roads, then I would get one. But if you are planning on going off-road quite a bit and plan on doing a lot of exploring, then I would avoid them. The stresses they can create to the frame of the camper can eventually cause problems. 

An important term you'll need to become familiar with when shopping for a truck camper is the truck camper's Center of Gravity (COG). Every camper has a COG which identifies where along the length of the camper the weight is centered. Basically, the camper's COG needs to be in front of your truck's rear axle. Most campers have a sticker identifing where the COG is located to take some of the guess work out of it. You never want to have the COG behind your rear axle because this will impair your truck's handling. Verifying that your COG is good is fairly easy and will require a couple trips to the scales with and without your camper. If your front axle weighs less with your truck camper on your truck then your COG is "off." You can usually correct this by reloading your camper, ensuring that most of the weight is in front of your rear axle.
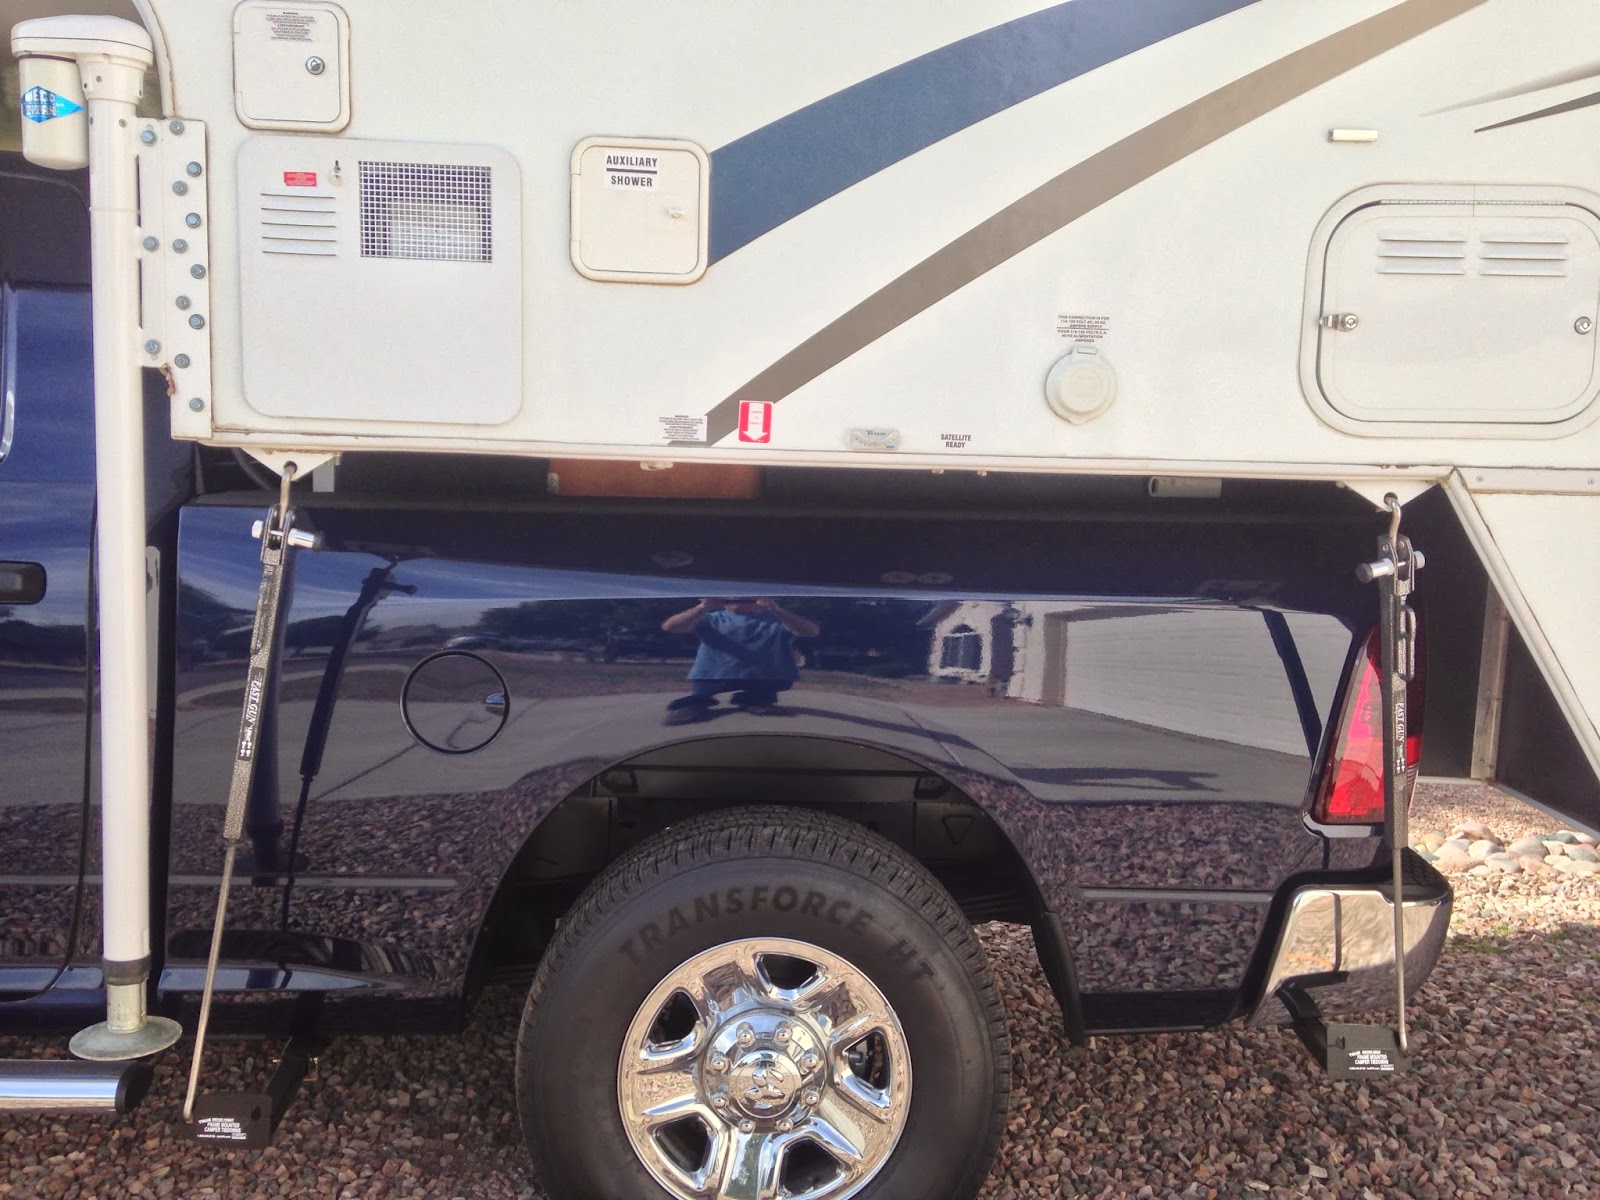
III. Truck Camper Equipment


Keeping your camper anchored to your truck is obviously critical and is accomplished by using a combination of truck camper tie downs and turnbuckles. There are basically two tie down systems from which to choose: Torklift and Happijac. Both are fine systems with each offering several advantages and disadvantages. The big advantage of the Torklift system is that it bolts to the truck's frame underneath the truck bed and is a stronger more rugged design, while the Happijac system requires drilling into the truck's bed and rear bumper to install. The Happijac system does prevent side-to-side movement better and is probably better for off-road use, but the Happijac rear bumper tie down mounts have been known to fail under stress. All things considered, I prefer the Torklift system, but that's my personal preference. Check with your truck camper manufacturer to see which system they recommend. Warranties may be voided if you choose the wrong one. Four tie downs, two in the front of the camper and two in the rear, are needed to secure your truck camper to your truck.

Torklift Tie Downs and Fastguns.

Turnbuckles are essential pieces of hardware in truck camper ownership. They act as the "middleman," securing the truck camper to the tie-down system of the truck. Strong winds, rough roads, and driving at highway speeds will test the ability of your tie downs and turnbuckles to control the forces or stresses working against your camper. Proper tension and installation of your turnbuckles is critically important. Make sure you read and understand the installation instructions for your turnbuckles to ensure they work optimally. For instance, too much tension can cause damage to your camper; too little tension can allow your camper to shift and slide while your drive. I use and highly recommend the Torklift FastGuns to secure my camper. For an in-depth review of the Torklift FastGun, check out my review here.

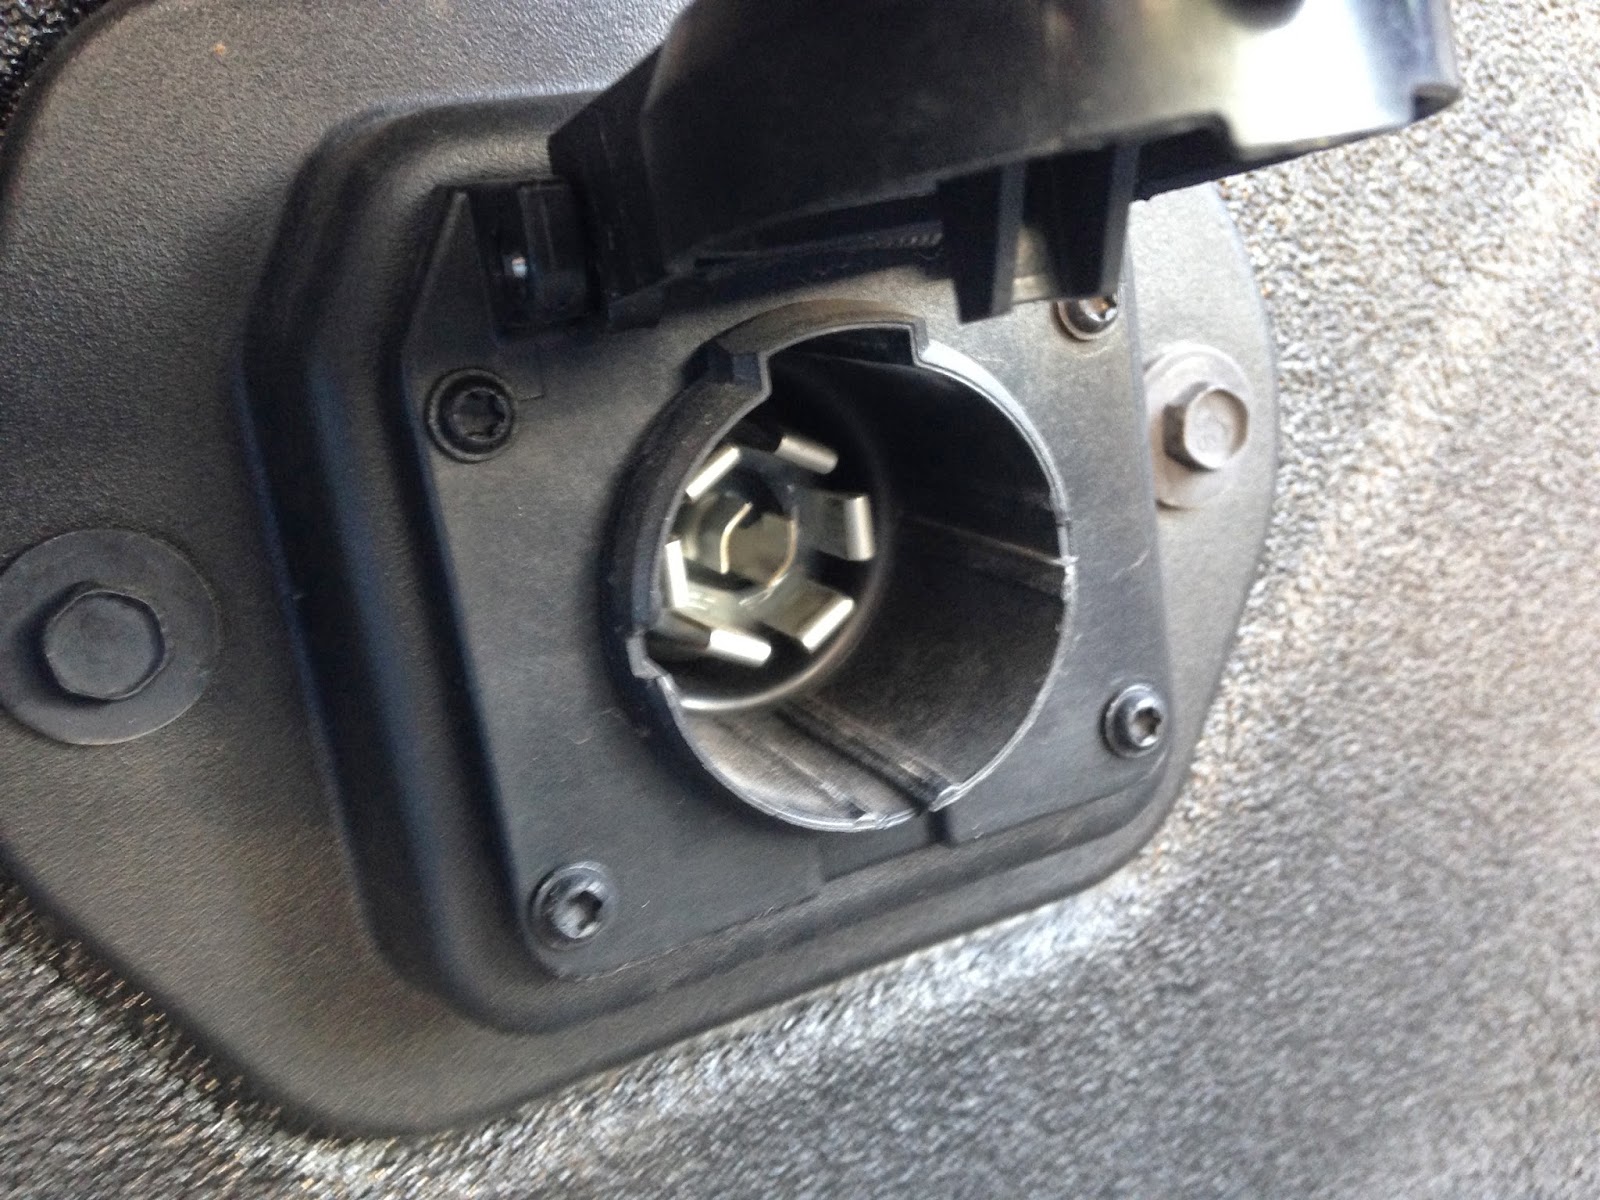
The umbilical connection or "pigtail" provides your truck camper with the running, brake, and turn signal lights needed to be legal on the road. It also provides an important connection to your truck's alternator to charge your camper's battery while driving. The 6-pin receptacle for this connection is usually located on the driver's side front of the camper (though many pop-up truck camper manufacturers place the 6-pin receptacle in the back). Due to this placement, truck camper owners will often install a standard 7-pin electrical RV receptacle on the driver's side, front of the truck bed. But another perfectly acceptable option is to simply run an extra-long umbilical from the front of the camper to the 7-pin receptacle at the rear of the truck. Remember, only six wires are needed for a truck camper since the truck camper doesn't have its own brakes (the brakes run on the blue wire). For a more detailed look at the pigtail wiring for truck campers, please click here.

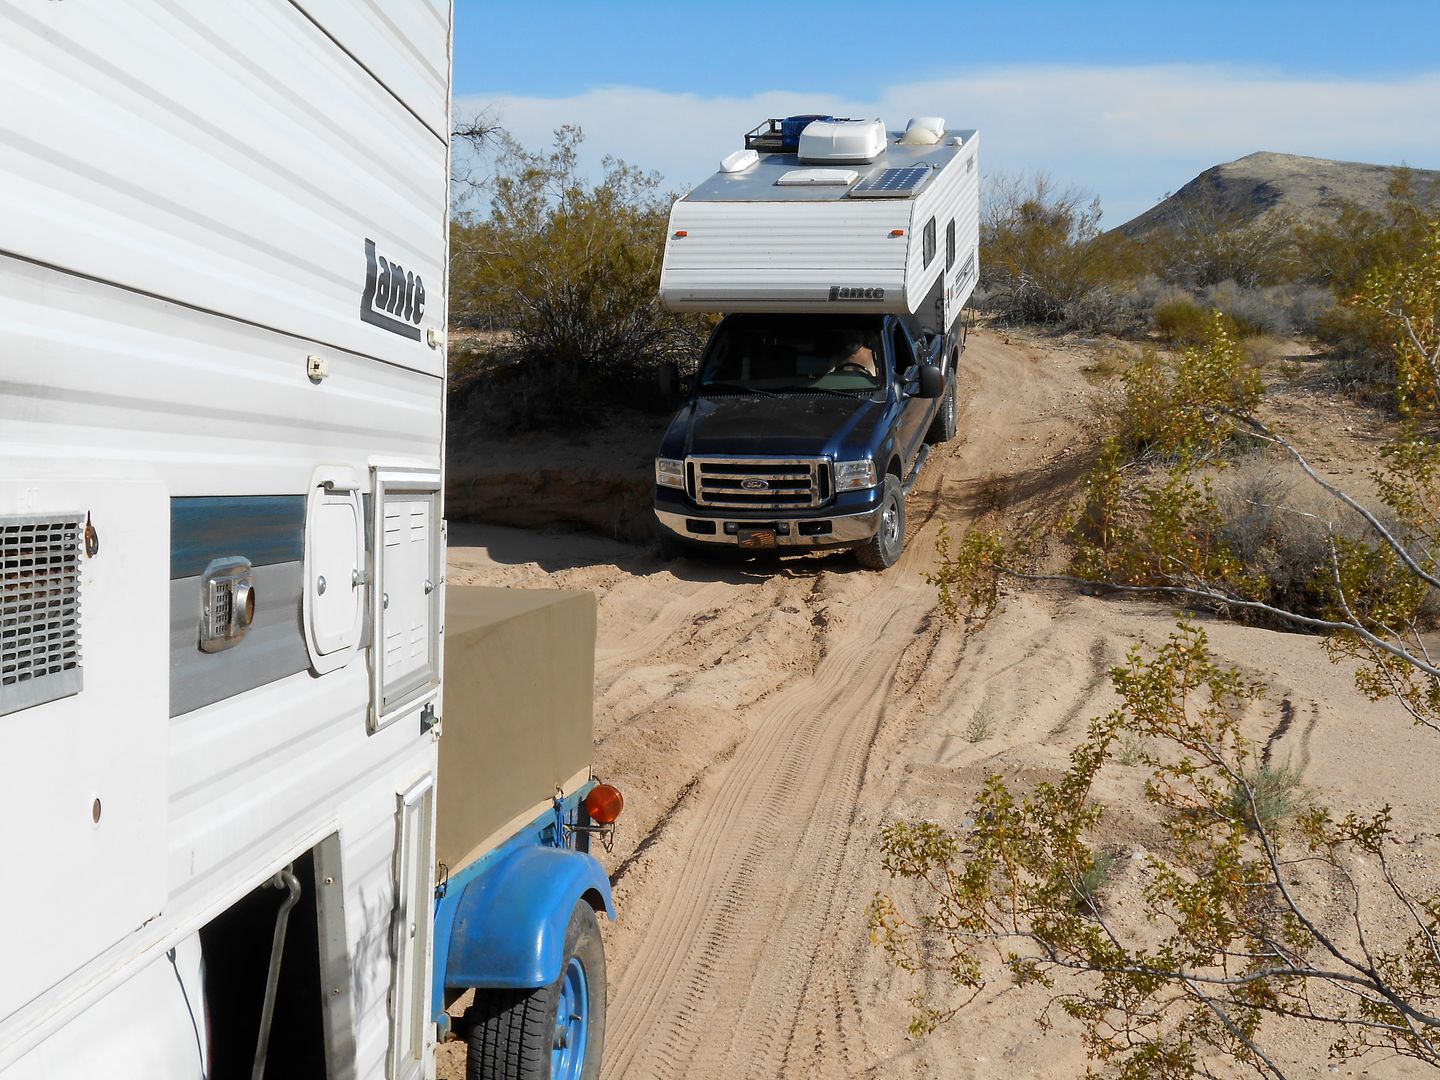
The ability to tow is one of the great things about owning a truck camper. An important thing to keep in mind when towing, however, is that the tongue weight of the trailer must be factored in against the truck's rated payload. A boat, horse, or utility trailer will typically have a tongue weight anywhere between 200 and 500 lbs, depending on the size of the load (tongue weight, of course, will not be a factor when towing a vehicle "four-down"). Moreover, if you want to tow, you'll probably need a hitch box extension since many truck campers extend anywhere from 18 to 24 inches from the rear of the truck. Available in different lengths, a hitch box extension is simply a metal tube that fits into a standard hitch receiver.
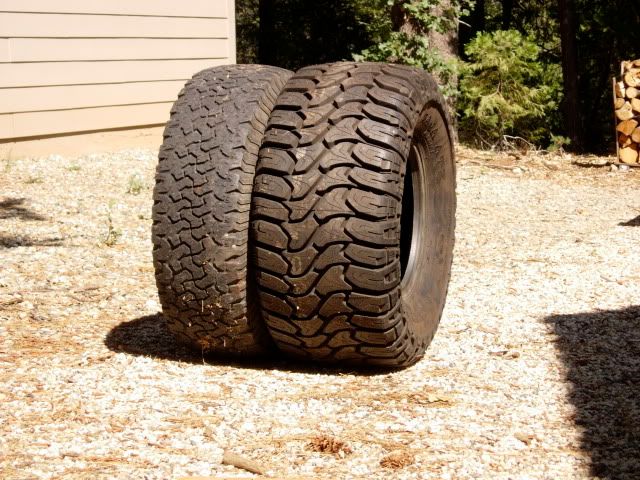
IV. Truck Suspension and Tires

Nothing is more important to the handling and safety of your truck than your tires. Together, they bear the entire weight of your truck and truck camper combo. If you plan on hauling a truck camper, you'll generally want Light Truck (LT) tires with at least a Load Range rating of E. However, not all Load Range E tires are created equal. Sizes and weight ratings differ, so you'll want to ensure that the tires you're looking at can handle not only the weight of your truck, but also the weight of your truck camper. And if you're upgrading your tires, you should also seek additional load capacity over the OEM ratings. Keep in mind that the weight on the rear axle is evenly divided by each tire, so an axle with a GVWR of 6,200 lbs will come with tires rated for 3,100 lbs. The maximum inflation value for Load Range E tires is 80 psi.

Proper inflation of your tires is vital--check them regularly. Refer to your truck's documentation and the door jamb sticker to determine the correct inflation rating for your tires. For example, the door jamb sticker for a 2013 Ram 3500 truck with LT275/70R18E tires calls for 60 psi for the front tires and 80 psi for the rear. These values are for hauling the maximum payload of the truck, so the tire pressure in the rear can be lowered if you're hauling less that the maximum payload or nothing at all. Make sure you check your tires regularly for abnormal wear and proper inflation, especially before leaving on each trip. As for the size of the tires, that's a personal choice. Those who haul around long-bed truck campers, the heaviest campers on the market, swear by 19.5 inch tires (Load Range H) because of the stiffer sidewalls and how well they handle with the extra weight.

As for the type of tires to put on your pickup truck, it depends on where you live, the kind of roads on which you travel, and where you like to camp. If you live in an area where winter ice and snow are the norm and you like to winter camp, you'll want to have a good set of stud-less snow tires to provide the traction you'll need. For those who plan on doing primarily highway driving and who live in a temperate climate, then a good set of all-season highway tires will be more than sufficient. Another great option is a quality set of all-terrain (A/T) tires. These work well for both highway driving in all conditions as well as off-road travel and are an excellent alternative for those who don't want to bother with a specialized tire. As for my favorite brands, I really don't have one. Over the years I have purchased all-terrain tires from several manufacturers, including BF Goodrich, Firestone, Toyo, and Michelin, and have liked them all and got excellent service out of each.

Typical spring pack for an unloaded one-ton truck.

Most people know how critical wheels and tires are to truck handling and safety, but the truck's suspension system is important, too. The suspension system consists of coil springs and leaf springs as well as shock absorbers and linkages that connects the chassis to the axles and wheels. All combined these components directly contribute to a truck's handling and braking and play a major role in driving pleasure and comfort.

My philosophy on suspension upgrades is simple. It's best to drive your truck with your camper mounted first to see how it handles before spending any money on upgrades. Otherwise, you may waste a lot of money on hardware you really don't need. I see this happen all the time. Based upon the opinion of friends and what they've read on Internet forums, new truck owners will immediately shell out big bucks on new shocks, air bags, and Stableloads before even buying or taking a test drive with their truck camper. This is backwards. It's best to first see how your truck handles under load and treat each symptom that you encounter with the correct suspension modification. Moreover, only one modification should be made at a time to determine its true effectiveness.

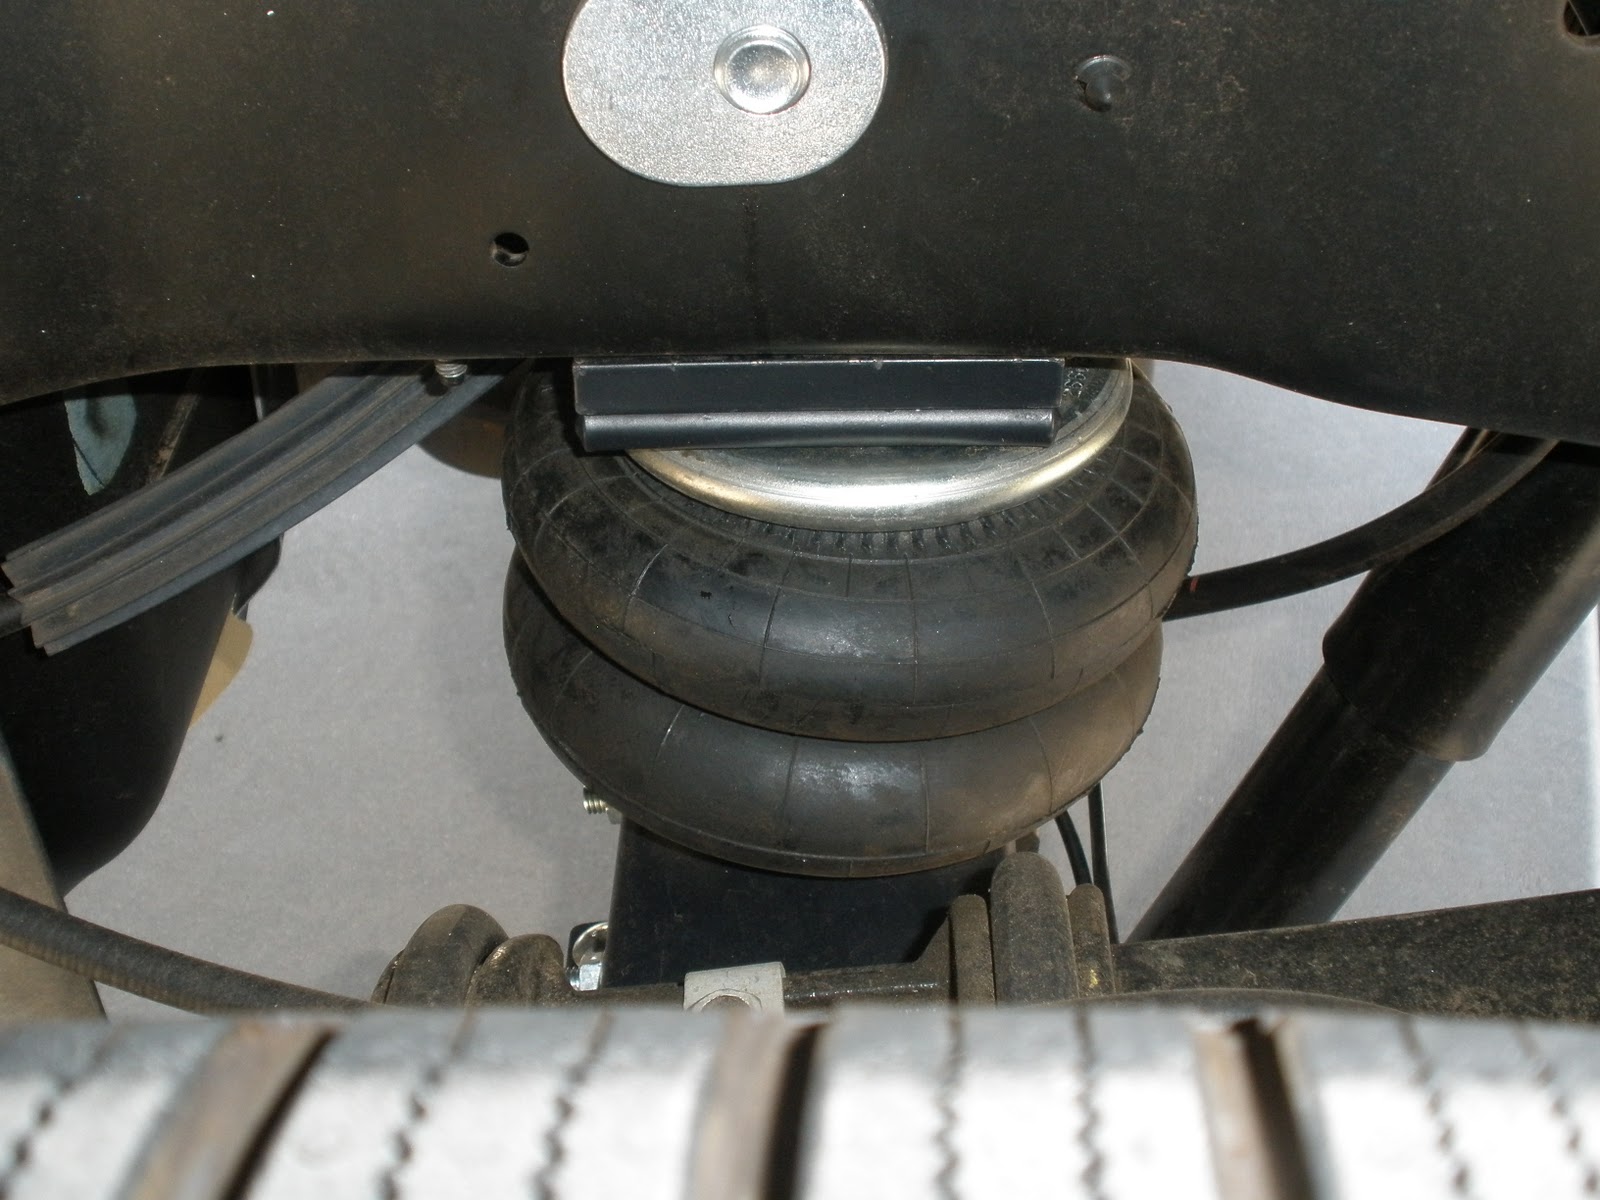
If you find that your truck sags too much in the rear with your camper mounted you'll need to make some changes. The most common remedies for rear sag include leaf springs, Torklift Stableloads, and air bags. Of these, adding another leaf spring is probably your best bet as they provide a much better ride and much improved spring travel compared to a truck with Stableloads or a large overload spring. Stableloads, however, are an effective modification, too. By engaging the overload spring sooner, they not only prevent sag, but they can also prevent sway and improve control. If you do decide on Stableloads, I recommend the quick disconnect version as they can be engaged or disengaged in a matter of seconds. The last viable option to correct rear sag are air bags. They're easy to use, adjustable, and are great for side-to-side loading when one side is lower than the other, but they can also can create too much roll when they are overfilled and aren't particularly suitable for off-road use.

A Firestone Ride Rite Air Bag.

The shocks that came with your truck may or may not be up to the task of carrying the extra weight of a truck camper. The dampening effect of your shocks is important in how well your truck and camper rides when going over rough and uneven roads and terrain. Shock absorbers comes in two basic forms: self-adjusting or manual. Self-adjusting shocks, like the Bilsteins or KYBs, do exactly that, they adjust based upon the force asserted each time they're depressed. Manually adjusted shocks, such as the Rancho 9000, allow you to change how much dampening is applied based upon the weight you are carrying. The adjustment can be made either on the shocks themselves, the cheaper option, or within the cab with a spendy remote unit. The pros and cons of each are pretty obvious, it comes down to personal preference and cost.

For those who are experiencing excessive sway or roll on sharp turns you can try the aforementioned Torklift Stableloads or a sway bar like the Hellwig Big Wig. Both are excellent products, but work differently. Stableloads work with the leaf springs to engage the overload springs sooner while the sway bar works with the axle and frame of the truck to keep the truck level. Most of the three-quarter and one-ton trucks coming off of today's assembly lines come with a front sway bar only, but many find that a rear sway bar is also needed for added stability and handling when hauling a truck camper. Some truck owners have even replaced the front OEM sway bar with a beefier aftermarket sway bar and saw a noticeable improvement in handling. For an in-depth review of the Hellwig Big Wig, click here.

V. Truck Camper Loading and Storage

Like hitching a trailer, perfectly backing your truck underneath your camper takes a little practice. When backing in it's best to align the camper with some reference point in the truck bed. I like to use painter tape placed in the center of the camper and in the center of the truck bed as reference points. It doesn't matter what you use as long as it works for you. For the whole process it's best to have another person spot for you as you back in your truck. This way you can ensure that the yaw of your camper is straight and is perfectly aligned in the middle of your truck bed. Electric jacks make all the difference in the world when raising and lowering your truck camper and makes the whole process of loading and unloading your camper much easier and quicker. If you don't have them, I strongly recommend that you get them. You won't regret it.
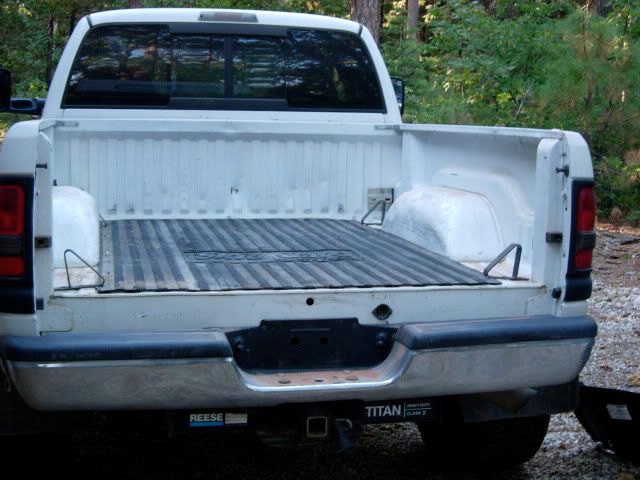
The Dee Zee heavyweight bed mat.

Another consideration in truck camper loading is whether or not to use a thin, heavyweight bed mat. Personally, I think they're a must. The mat not only protects your bed or spray-on bed liner from being scratched, but also prevents your truck camper from sliding around while driving your truck. You can buy specially made mats for the specific make and model of your truck or you can go cheap and buy generic anti-fatigue floor mats like those sold at the big box stores. Having tried both, I prefer the former. These fit better and prevent your camper from sliding around better than generic mats. I now use a Dee Zee heavyweight truck bed mat in my Ram 3500.

Should the tailgate be left on or removed from your truck? It depends on the length and model of the truck camper, but in most cases, the camper won't load properly with the tailgate on, so it needs to be removed. Even if your camper does load with the tailgate down, you should still remove it. When it comes to truck campers every pound matters, especially when that weight is behind the rear axle. Why haul a 60 to 80 lb tailgate when you don't need to? It only takes a few minutes to remove and with it off you don't have to worry about the paint getting damaged by stones being kicked up from underneath.

When it comes to supporting your truck camper off the truck, some manufacturers recommend that you do, and some don't. Newer campers with aluminum frames appear to be engineered better to handle the stress where the jacks are attached to the camper's frame, while older one's aren't. So if you have an older wood frame model from, say, the 1990s, you may want to provide additional support for your camper. It's best to refer to your owner's manual to see what is recommended by the manufacturer. As for what to use to support your camper, there are many different ways to do it. Perhaps the simplest and most effective way is to glue and screw several 1x6's together and stack them is such a way to provide sufficient support.

Building Your Own First Aid Kit

$
0
0
On a recent outing near my home, I unknowingly rested my sandal-clad feet near a nest fire ants and got stung several times on my left foot. Unfortunately, these nasty little buggers are pretty common here in the Southwest. I had been stung by these ants before and didn't have much of a reaction, but this time around my foot swelled up and felt like it was on fire. The pain lasted a good 48 hours and it was difficult to even sleep or walk on it. Not only that, but the redness and discomfort in my left foot lasted for another week. For the treatment of fire ant stings, doctors will tell you to take an antihistamine like Benedryl, a good pain killer and anti-inflammatory like Aleve, and to apply hydrocortisone creme to the wound site 3-4 times a day to reduce the swelling and redness.

Fortunately, I had all of these items at home to take care of my foot, but it got me thinking about the contents of first aid kits that I have in my truck camper and Jeep. Would I be ready for a similar incident during my travels? If you don't have a well stocked first aid kit in your RV or Jeep, you need to get one. A first aid kit is an essential item for anyone who is serious about spending time in the great outdoors. I'm not just talking about a small box of band aids, alcohol wipes, and a bottle of aspirin either, I'm talking about a good, well-stocked first aid kit to treat all kinds of wounds and conditions. There are two ways to get one. You can purchase a commercial off-the-shelf first aid kit, like the excellent Adventure Medical .9 Kit, or you can build your own. This article focuses on the latter using one of the finest portable medical pouches to protect and organize your kit, the Maxpedition FR-1. Here are the first aid items I have in my FR-1:
  • Adhesive bandages (band aids): Assorted sizes for small cuts, blisters, etc. 
  • Closure strips or butterfly closures: For closing large wounds. The four-inch strips are more
    effective. 
  • Sterile dressing pads (4x4 inches, 5 ea):To apply pressure to a wound to stop bleeding.
  • Non-adherent sterile dressing (2x2 inches): Use to cover blisters, burns or lacerations. 
  • Gauze roll:Holds dressing in place. 
  • Adhesive tape (1-inch roll): Holds dressings in place. 
  • Cold compress packs (2 ea): To reduce swelling and for pain relief. Can also be an effective aid in treating heat exhaustion.  
  • Ammonia inhalant: Individually wrapped packs to prevent or treat fainting. 
  • Tweezers: For removing splinters and ticks and for removing debris from wounds. 
  • Scissors: Trauma scissors, which have a blunt end to protect the patient, can be used for cutting away clothing from injury, cutting medical tape, etc. 
  • Safety pins: Can help remove splinters, fasten arm sling, or to make a hole in a plastic bag for improvised wound irrigation. 
  • Cotton-tip swabs: For removing foreign objects from eye, or applying antibiotic ointment. 
  • Tampons (2 ea): Good for not only soaking up large amounts of blood, but also as a fire starter. 
  • Resealable plastic bags: Many uses, including icing a swollen joint or creating a wound irrigation device. 
  • Alcohol wipes:For cleansing small wounds. 
  • Topical antibiotic ointment: Prevents infection from minor scraps, cuts, and burns.
  • Moleskin:Prevents blisters. Cut and apply a section to your foot as soon as you discover a hotspot. 
  • Super glue: In the absence of stitches, seals deep cuts. 
  • Burn cream: Assists in the healing of damaged skin from minor burns. 
  • Pain relievers:Provides temporary relief for minor aches and pains, reduces fever, helps reduce inflammation of sprains and other injuries. 
  • Antihistamines: I prefer Benadryl. For relief from pollen allergies and to reduce any reaction to bites and stings. 
  • Imodium 2 mg capsules or tablets: For relief of diarrhea from intestinal infections. 
  • Hydrocortisone 1% cream:Relieves the swelling, itching, and redness from insect bites and stings and any allergic reactions. Can also be used for poison oak and poison ivy. 
  • Antacid: Purchase individual calcium carbonate packs or your antacid of choice.
  • Latex or nitrile gloves: Protects against blood-borne diseases and infection. 
  • Electrolyte packets (3 ea): For treatment of dehydration, heat exhaustion and loss of fluids from vomiting or diarrhea.
  • Disposable mask: To prevent the spreading of germs. 
  • Space blanket:Lightweight emergency shelter. For treating shock and hypothermia victims. 
  • Emergency whistle: Distress signal to call for help. 
  • Water Purifier Tablets:Chlorine dioxide tablets to sterilize water. Be sure to wait the required time before drinking (usually an hour). See directions for details. 
  • Spark-Lite Fire Starter:To prevent hypothermia and sterilize water. Should include a sparker or lighter and tinder.
  • Paper and pencil: For recording medical data such as body temperature, pulse, time and date of symptoms, injuries, medicines administered, etc. Most repackaged kits include accident report forms.
  • Thermometer: Takes the guesswork out of determining fevers.  
  • Small flashlight: For nighttime illumination (check batteries often). 
  • First aid instruction booklet: Should cover the basics of first aid treatment.  
      The inside of the Maxpedition FR-1 first aid pouch.

      Fortunately, most of these items can be found at your local drug store. When assembling and organizing smaller items in your kit, use clear, resealable baggies. Ensure all medications are labeled. If you have room in your kit, you can also include other commonly used items like a stick of Burt's Bees Lip Balm, a small tube of sunscreen, and a quality insect repellent. For the latter, I prefer a non-deet based insect repellent, Quantam Health's Buzzaway. You’ll also want to supplement your kit with any prescription medications that you and your family may be taking and have items like an epinephrine pen for those who are allergic to bee stings. Check the items in your first aid kit periodically to ensure they aren't too old or have expired. If an item in your first aid kit gets used, replace it as soon as possible (things like moleskin, band aids, and aspirin get used the most in ours).

      The focus of this article is on making your own first aid kit, but a few words about the Maxpedition FR-1 are warranted. This rugged, little pouch was designed specifically to house and organize a first aid kit. It measures 5.5-inches long, 2.5-inches wides, and 7-inches high. When un-zippered, the FR-1 opens like a giant clam shell. You won't find any pearls inside the FR-1, but you will find multi-layered pockets and elastic loops to keep all of your first aid items organized. The pouch features a paracord cinch to keep it open, while the outside is lined with MOLE webbing so you can attach it to a backpack or keep it on a hook inside your RV. The outside also features Maxpedition's trade mark, their so-called Torch-Lair ,where you can store a small flashlight. Better yet, behind the Torch-Lair the pouch is lined with a field loop where you can affix a first aid symbol or an ID patch with your name and unit. I really like the FR-1, it makes for a very functional, very cool-looking first aid kit.

      I'd love to get your feedback on this list. If you can think of anything else I missed, please let me know. Thanks. 

        Bargain Alert: Renogy Solar's Solar Power Starter Kit

        $
        0
        0
        Are you looking to go solar for a bargain price, but don't know where to start looking? Well look no further. The good folks at Renogy Solar are offering their 100 watt Solar Power Starter Kit for the bargain price of $164.99 through Amazon.com. This high-performance, solar power starter kit will work well not only in an RV, but also an in off-the-grid cabin up in the mountains.

        Renogy Solar's solar power starter kit comes with almost everything you need to go solar. It includes a 100 watt mono-crystalline solar panel, the best, most efficient solar panel you can buy; a 30 amp Pulse Width Modulation (PWM) charge controller, capable of servicing up to four 100 watt panels; and two 20 ft MC4 cables to connect the solar panel to the charge controller. To complete the installation, you'll need four aluminum Z-brackets to mount the solar panel to the roof of your RV or cabin, a length of 8/2 wire to connect the charge controller to your 12 volt batteries, and a tube of Dicor lap sealant to waterproof the mounting screws and bracket bottoms attached to the roof. Each positive wire run to and from the charge controller should also be protected with either a 30 amp circuit breaker or 30 amp fuse.

        If you don't know much about solar power, you may be wondering what 100 watts will do for you. Well, 100 watts won't be able to run an air conditioner or a microwave. But with lots of sunshine, 100 watts will keep a single 12 volt battery fully charged, so you can run all of your 12 volt devices and a small inverter. If you have, say, two 12 volt batteries in your RV, 100 watts will provide a sufficient trickle charge to keep both from draining, if you watch your usage. Truth be told, if you have two 12 volt batteries (or two 6 volt batteries) you should buy Renogy Solar's 200 watt Solar Power Bundle Kit. In other words, every 12 volt battery in your system should be matched with a 100 watt solar panel for optimum performance. But if you're on a budget, the 100 watt kit will get your started, then you can add more panels later as your finances will allow.

        Renogy Solar's 100 watt solar power kit is a high-quality kit, and at $164.99, is simply the best price I've seen for a starter kit. If you're still a little leery about pulling the trigger, check out the customer reviews on Amazon.com. The reviews are overwhelmingly positive and feature a large number of informative questions and answers on the product. It's obvious that this kit is a big seller. Oh, and I almost forgot to mention that Renogy Solar is an American company based out of Baton Rouge, Louisiana. All of their products are made here in the USA. So if you're thinking about going solar so you can do some serious boondocking, don't just think about it, do it. This is a great price for a great product and will get you into the solar power game without emptying your bank account.

        Buckstop Classic III Winch Bumper on Order

        $
        0
        0
        After a few recent close calls with deer and elk, I decided it was time to do something about it. If your truck is like mine, your front grill is made of plastic, not much protection for the radiator if you happen to hit something. The last thing I want happening on an outing is to be disabled in the middle of nowhere, especially since my outings often take me to places where there's no cell phone service. So I decided to buy a heavy duty bumper to protect the front end of my Ram 3500 pickup truck from damage and to house another item that's been on my wish list for quite some time--a winch.

        After much research and deliberation, I decided to purchase a winch bumper from the good folks at Buckstop Truckware. Why Buckstop and not one from Fab Fours, Ranch Hand, or Ruenel? Because of their superior strength, features, and styling. Based out of Sherwood, Oregon, Buckstop Truckware is a true American company. All of their bumpers are made here in the USA. The company makes heavy duty front and rear bumpers for large and small trucks of various makes, including Ford, Chevy, Dodge, GMC, Nissan, and Toyota. As the name implies, Buckstop bumpers are meant to stop a buck from damaging the front end of your truck. Their winch bumpers come with an impressive array of standard features including a heavy duty grill/brush guard, a fully enclosed winch area, a winch access cover door, two Frenched light buckets, a 2-inch trailer receiver, and a flip-up license plate bracket.

        But what really sold me on Buckstop is their quality construction. Their winch bumpers are made with 1/4-inch steel in the primary impact zone and winch center and 3/16-inch steel under the headlights. The 190 lb bumper is stout enough to house a winch with a rated line pull of 16,500 lbs with the standard 4 1/2-inch x 10-inch bolt pattern. This pattern will accommodate most winches available in the market today. The grill/brush guard is made of 2 1/2-inch circumference tubular steel to protect the front end from high impact strikes. Better yet, the grill/brush guard is removable, perfect for those times when you need to service the grill/brush guard, radiator, or grill. A key feature of the Buckstop winch bumper, and a big selling point for me, is the winch access door. This protects the winch from the weather and elements and permits easy access to the winch for winching operations and maintenance. The company currently offers six different front bumper models, the Classic I, the Classic II, the Baja, the Boss, the Outback, and the brand new Classic III.

        The Buckstop Baja heavy duty winch bumper.
        The Buckstop Classic II heavy duty winch bumper.
        The Buckstop Outback heavy duty winch bumper.

        With six impressive looking winch bumpers from which to choose, I really had a hard time deciding on one. Initially, I liked the Baja the best because of the angular styling, but I had to remind myself why I was buying a winch bumper in the first place--for protection. Unfortunately, the Baja has a large opening in front of the radiator where a small deer could easily penetrate. Then I vacillated between the Classic II and the Outback. They both had the strength, looks, and functionality I was looking for, but I couldn't decide on one. Fortunately, during a call into Buckstop's customer service department, I found out that they're now offering a new winch bumper for heavy duty trucks, a model they're unofficially calling the Classic III or Modified Classic II. It's essentially a Classic II bumper with the brush guard mounting points pulled in at a slight angle. After viewing photos of this new offering, I quickly pulled the trigger. Unfortunately, I have to wait six weeks until I receive my bumper, but this will give me enough time to find a winch. The Warn 16.5ti is currently in the lead with the Superwinch 18.0 in a close second.

        View of the so-called Classic III (or Modified Classic II)
        Another view of the Classic III heavy duty winch bumper.

        Interview with Extreme Boondocking Expert, Bryan Appleby (Part I)

        $
        0
        0
        When it comes to truck campers and extreme boondocking, few people have gained more knowledge and experience than Bryan Appleby. Known on the Internet forums as bka0712, Bryan has been a full-time RV'er since 2009. He grew up on the plains of Kansas before dedicating his working career in the mountains of the West. Bryan worked as both a national park ranger and as astate policeman, the latter from which he is now retired. Bryan is also a published author and an accomplished photographer. He holds licenses in various car racing disciplines including high speed driving instructor. Consulting is his passion now, assisting communities with their open space planning and implementation, mixed in with a dose of driving instruction, writing, and photographic work. 

        Mike: Thanks, Bryan, for taking the time to talk. Let's start with the basics. What truck camper do you own and why did you choose that make and model? 

        Bryan: I purchased my first RV, a Lance 1191, in 2008. This was after researching and visiting numerous truck camper dealerships and RV forums. This process took me four years. Some of the requirements I was looking for were different than most who were purchasing a truck camper as my intention was to live full-time in mine. I wanted something that would provide me with both room and comfort, which had four season capabilities, had a quality, fit and finish, and had larger capacity reserves, such as water and storage. Essentially a base camp on wheels. 

        Mike: What truck do you drive and why did you choose it to haul your Lance camper?

        Bryan: My truck is a 2008 Ford F-550 Crew Cab, 4x4, DRW, with an extended frame. The engine is the 6.4L Powerstroke Turbo Diesel. Over the years I had been purchasing my personal and work vehicles from a Denver Ford dealer, Phil Long Ford. I worked with them to order a truck specifically for use with a truck camper and the modifications I had intended to allow me to boondock for extended periods in remote locations. When purchased, the F-550 averaged 10 mpg. With my finished rig, I have averaged approximately 7.1 mpg over the last 60 months. I chose this particular truck for its massive 13,700 lb payload. It has the 4.30 ratio limited slip axle, the heavy duty payload package, an additional transmission cooler, and the snowplow package.

        Mike: I don't see a traditional truck camper tie down system for your Lance camper. Is it permanently bolted to the bed of your truck?

        Bryan:No. With the service body, a new strategy was developed for attaching my truck camper. I had Unistruts welded to the top of my Knapheide service body. We used some brackets for a bulldozer attached to the Unistruts coupled with spring loaded turnbuckles from a parts bin for Crane Body applications. In five years of use there has been no movement or changes with these brackets.  
         
        Bryan racing in his 1965 Shelby Cobra, #75.
        Bryan's F-550 with service body, Lance 1191, and trailer.
        Closeup of Bryan's heavy duty Ranch Hand winch bumper.

        Mike: I'm glad you mentioned your service body. It seems like they're becoming more popular with truck camper owners. Can you tell us more about yours? 

        Bryan: My F-550 service body serves me very well for full-timing. Even in the winter months, I use some of the compartments as an auxiliary freezer! I knew from the onset that a service body was in my plans. When I purchased my Ford truck, I applied for Ford’s upfitting rebate available with their fleet sales. I also arranged to have the service body purchased with the truck and used their upfitter to perform the work. This saved me many dollars in sales taxes and time. In fact, the rebate I received almost paid for the entire service body! While many choose to go the route of a custom service body, I didn’t. I ended up ordering one right out of the Knapheide catalog. I used Layton Truck Equipment of Denver, a great company that was more than willing to work with me. The eventual cost was $8,040, including the service body, painting and installation. This was half of what it would have been, going with a custom manufacturer.

        Mike: Tell us a little bit about your utility trailer, Bryan. What exactly do you store in it?

        Bryan: Behind my F-550, I pull a Haulmark 8x14 Motorcycle trailer. While my intentions were not to pull a trailer, to allow more maneuverability, I soon learned that the platform I had envisioned on the back of my truck and truck camper would not be a workable solution for carrying a BMW GSA motorcycle. My plan was to use this motorcycle as a get around vehicle. While it certainly is a compromise in having a trailer, I have found the positives, in actuality, far outweigh the negatives. For security reasons, I won’t provide details of what I have in my camper and trailer, I will say it's no different than what a person’s garage provides for someone living in a home. I carry many toys, like kayaks, bicycles, skis and things, but it provides more than that. This trailer provides me with the ability to extend my time in remote areas, with additional fuel for the motorcycles, seasonal items, food as well as my main battery bank for one of my two solar power systems. 

        Mike: Can you tell us about your motorcycles?

        Bryan: Sure! One of the reasons I'm successful full-timing in my truck camper is because of my “get around” vehicle. I chose this vehicle before I made the decision on what truck camper to get. My first motorcycle was a 2008 BMW GS1200R Adventure and I'm now riding a 2012 BMW GS1200R Adventure. Much of my riding is exploring the trails and roads in the areas where I visit and my BMW is set up for this type of riding. When the trails become even more extreme, I use my second motorcycle, a 2006 Honda CRF450X dirt bike. 

        Mike: Can you tell us about your battery systems and how they're hooked up to your camper? 

        Bryan: With my rig, I have essentially three battery banks: two OEM batteries that service my Ford truck, two 6-volt Lifeline GPL-6CT AGMs (300 amp hours) in my Lance camper, and eight 6-volt Interstate GC2 flooded wet cell batteries (928 amp hours) in my trailer. Redundancy is an important consideration for me. The AGM batteries in my camper are maintained by the solar panels installed on the camper's roof (300 watts total). While they're wired to provide power for both my DC and AC side of my camper, they're currently maintaining the DC side of my truck camper. Similarly, the eight 6-volt wet cell batteries in my trailer are maintained by the solar panels installed on the trailer's roof (920 watts). They, too, are wired to provide power for both the DC and AC side of my camper, for now this battery bank is providing my AC side of my truck camper. My shore power cord is essentially plugged into this bank, full-time, via one of my two Xantrex MSW inverters (2,000 watts and 1,500 watts).

        The 6-volt battery bank in Bryan's motorcycle trailer.
        View showing the solar arrays on Bryan's camper and trailer.
        Bryan's BMW GS1200R Adventure motorcycle.

        Mike: Why the mixture of AGM and wet cell batteries in your two battery systems?

        Bryan: The reason I made the choices I did on my batteries was easy. For the batteries I had installed in the cabinet of my truck camper, I chose Lifeline AGMs. This was because of their compatibility of being in a living space. The wet cell batteries I chose for my large battery bank in my trailer were Interstate batteries, available virtually anywhere in the United States. With these batteries performing much the same as AGM batteries, and the fact that they were $2,650 less expensive than comparable AGM batteries, it came down to an economic decision. I could do a lot with the $2,650 I saved and still have batteries that can perform similarly for five to seven years. 

        Mike: You also have an impressive solar power set-up, Bryan. Can you tell us more about it? 

        Bryan: While I received great information and help from others who had solar power systems, I quickly found out that nobody had built or had attempted to build the system I had in mind. Because of I'm a full-timer, I needed an electrical system that was bigger than most. With my camper and trailer I was able to build two separate, independent solar power systems. This two-system approach allows me to leave my trailer in the sun while I park the camper in the shade. I also wanted two solar systems, in case one were to ever go down, I'd have the other. Both systems also have interchangeable hardware in case of a failure. To keep each system “exercised” daily, I have both systems running, one AC (using an inverter) and the other DC. My two systems consist of the following equipment: 
        Mike: You're, obviously, a big proponent of solar power. What recommendations would you offer to those who are thinking about going solar? 

        Bryan: Have a large checkbook! Okay, perhaps I'm being a little facetious, but it's accurate. For most, solar is not as practical as adding additional batteries and a good charging regiment. For the weekend camper, or an occasional long vacationer, solar is an expensive option. If you're moving every couple of days, your vehicle should keep your batteries topped off. Running an inexpensive generator a couple of hours or less, or stopping in campgrounds with hookups will do the same. However, if you're really set on going to solar, I'm there for you. Developing my solar program has been a life changing event for me here on the road. I don’t move around a lot, but I could and did run a generator every day, the first two years I was full-timing. The two things you need to decide on is how many seasons you are going to need them and what your anticipated demands will be. Do a power survey. The Kill A Watt electricity usage meter is a great aid to help you determine the size of the solar power system and number of batteries you'll need.

        Boondocking in the Valley of the Gods, Utah.
        Bryan & friends at Teakettle Junction, Death Valley NP.
        Boondocking with yours truly in the Vermillion Cliffs NM.

        Mike: What modifications have you made to your Ford F-550? 

        Bryan: I'll be one of the first to stop and look and crawl around a well set up off-road vehicle, but that's not for me as I prefer to keep my vehicles stock. With this, I did change out my front bumper to a Ranch Hand winch bumper, to provide more protection to the plastic front end of my F-550. Also on this bumper is a Warn 16.5K winch, a Thule Apex 4 Bike Hitch Rack, and a pair of KC HiLiTES Daylighter II off-road lights. The original 19.5 OEM wheels and tires have been swapped to a set of 19.5 Rickson wheels and a set of Continental 245 profile tires. This change provides me with a greater capacity and safety factor for my travels off-road. I also installed a rear deck and a hitch that I built to accommodate carrying additional spare tires for the truck and trailer as well as a receiver to tow my trailer. This hitch also has a side facing receiver to supplement my Lance steps with an additional removable steel step. In the bed of my truck are two 74 gallon potable water tanks that I use to supplement the potable water tank in my Lance camper. This added capacity gives me a total of 192 gallons of potable water. 

        Mike: Can you tell us more about your Continental tires? What inflation values do you typically run and what are their weight capacities?

        Bryan: The current tires are Continental 245/70R19.5G HDRs on new Rickson wheels. These tires have a capacity of 18,700 lbs at 110 psi on the dually rear axle (rear GAWR 13,660 lbs) and 9,880 lbs at 92 psi on the steering axle (front GAWR 7,000 lbs) for a whopping 28,580 lbs. Now that's a safety factor. A recent TARE ticket showed my steer axle 6,040 lbs, drive axle 14,100 lbs, and trailer axle 5,040 lbs. Total weight: 25,180 lbs.

        Mike: Have you made any modifications to your F-550's suspension?

        Bryan: Yes, the only suspension modification I did was to install a set of air bags. I had air bags on my previous F-350s to assist leveling out the back of these trucks for the tongue weights of my race trailers. I had thought it would be a slam dunk to have on the F-550 as well, so I added them during the first few weeks of owning it. Soon, it became evident that the truck’s spring packs were more than capable of carrying all the extra weight of the service body, aux tanks and camper without a “blush.” What I use the air bags for is for leveling out my truck when I arrive at camp. After previous experience with aux air pumps, I opted out on one and just installed the left and right air inlets in the curb-side cabinet of my service body where my fore and aft and left and right bubble levels are under the skirt of my lance. It makes it convenient to stand in one place and do all of my leveling. I also installed another bubble level in the passenger compartment of my F-550. This level is in an area of the passenger door pocket that can only be seen from the driver’s seat. This makes it easy to better discern a great spot or whether my ramps will make it work.

        The rest of this fascinating and informative interview with Bryan Appleby can be found by clicking here.

        Interview with Extreme Boondocking Expert, Bryan Appleby (Part II)

        $
        0
        0
        This is the final installment of my two-part interview with full-time RV'er and extreme boondocking expert, Bryan Appleby (aka bka0712 on the Internet forums). Part one of this fascinating and informative interview can be found by clicking here. 

        Mike: Some may question your choice in choosing a truck camper over a motorhome or a toy hauler to full-time in. What would you say to them?

        Bryan: When I first decided to buy an RV and go full-time, I thought it would be in a 5th Wheel. But after looking at several, I was totally turned off with their excessive size and lack of maneuverability. Motorhomes and van conversions were discarded due to the fact they didn’t conform to my “two use rule of backpacking.” I wanted something I could switch out if I decided to upgrade or use my tow vehicle when I got off-road. Plus, my Ford F-550 gives me a proven equipment, frame, and 4x4 suspension standard that you can't get with other RVs (EarthRoamer starts with an F-550 for this reason, too). The serviceability of a Ford, in the areas where I travel, was a big plus, too. For repairs and maintenance, my truck is engineered to be lifted off the frame to enable work on the driveline. You can't do this with other RVs! The off-road clearances for the aforementioned RVs just wasn’t there either. So when you take into consideration the modifications I was able to do to my F-550, that I would not be able to do on a motorhome or van conversion (like propane, water tanks and storage and higher tongue weight rating), it was an easy decision for me.

        Mike: When you were talking about your solar power system earlier, you mentioned how your solar upgrade was life changing. Will you share with us why that was?

        Bryan: Reflecting back to the beginning of my full-timing adventure, I realize now I had it really tough those first two years. So much so, that knowing what I know now, I might have just given up. There were a number of factors that put me there, including a naïve approach in determining my daily power needs. I was running my generator two to three hours a day, much more than I wanted to do to maintain my batteries. I soon found myself seeking out public libraries and picnic shelters for their electrical outlets to plug my laptop into. Something had to change and giving up was not one of them. Fortunately, solar power proved to be the solution for me, though it took me several years and a phased approach to reach the point where I currently am. I was also fortunate that I had several individuals who advised me. I now have a 1,200+ watt solar power system that meets my needs for all four seasons. The stress of having enough power to meet my needs is no longer there. Now I only use my generator on cloudy or snowy days to keep my batteries topped off. So as you can see, solar power has been life changing for me.

        Mike: What things have you learned as a full-timer that have enabled you to extend your boondocking stays in remote areas?

        Bryan: While I had set my original goals to living off-the-grid, I soon found I wanted to go even further. I wasn't satisfied with going out for only a week or two, but wanted to extend that time to a month or two. This is what I call extreme boondocking. When I first started out, the best advice I received from other truck camper owners was to go out and do test runs even if it is in your own driveway. From this I learned to identify things that will impact where you can or cannot stay longer. Here are some specific things I have learned:
        • Water: Carry additional water in separate water vessels and have the ability to transfer this water to your camper, easily (I average 17 gallons a week). Also, when available, use other water sources for non-potable needs such as bathing and washing clothes (yes, I wash my clothes while boondocking with a three-bucket method).
        • Propane: Carry enough Propane to cover the length of your stay, plus some emergency volume (I average 250 gallons a year).
        • Food: Experiment with preparing food that can be made with bulk ingredients; grains, pasta, cereals and many items available on your grocery shelves, like foil tuna and chicken, as well as canned goods. By repackaging fish and salmon and freezing them in your RV fridge, they will take the shape of your RV Fridge, thus saving room for more (I average $150 a month for food).
        • Power: Determine what your main source will be, either AC or DC. Build upon one or both. I have two solar power systems, one on my camper, the other on my trailer, that handle the AC and DC loads separately. I also have two generators, a Honda EU3000iS and a Cummins Onan RV QG 2500.
        • Clothes: Keep things simple. Carry clothes that meet all of your needs for that particular season. One issue for me is that I full-time, so I need to carry clothes with me for four seasons and for all of the outdoor activities I partake in. Having the capability of washing clothes while boondocking helps make up for carrying lots of clothes, as well as clothes that can be washed and dried easier. 
        Drying laundry in the Mojave Desert.
            Closeup of Bryan's F-550, Service Body & Lance 1191.
            Winter boondocking in Yellowstone National Park

              Mike: Do you have any tips for our readers on how to locate great boondocking spots? 

              Bryan:  As of today, I have over 1,830 days of boondocking and living off-the-grid. It has been an education, sort of a road of hard knocks. I've come to realize that boondocking is actually simple, if you have the right mind set. What is that mindset? That I will NOT stay in a campground! This mindset has proven really useful when traveling through unfamiliar country. In addition to this mindset, I've developed additional skills to assist me in finding great boondocking locations. Some of these are:
              • Don't be afraid to ask. When visiting a new town or park, ask the locals if there are any locations in the area where you can camp off-the-grid. Police, fire stations, ranger stations, and small town post office employees have proven to be my best sources for information.
              • Use your friends on the Internet RV forums. Many are more than happy to share some ideas and places where they have stayed. Start a bookmark on your computer or road atlas, as I do by state, even if you aren't going there, yet. Your website, Mike, has been a great boondocking source for me many times.
              • Use your eyes as you drive along your route and start evaluating locations, even if you aren’t ready to stop for a few hours. Make it a game just like when you were kid and playing "Slug Bug" with your sister. With this, you will sharpen your skills in determining what does and does not work for you and your RV. 
              • Having a "get around" vehicle is a great asset. Whether you're near a populated area or out in the "boonies," park your RV in a secure area and explore on your motorcycle or in your toad. This is a great way to find those hard-to-find boondocking locations.
              • Google or use other satellite services is one of my favorite search tools. I use this often, scouting where lakes and rivers have access points and meadows for me to get to.
              Mike: Those were some great tips, Bryan. Do you have any similar tips for "stealth" camping in urban areas?

              Bryan: As I travel, I'm often traveling through and stopping in populated areas. This is part of the full-timing experience and having good stealth camping skills is equally important, especially when shopping or visiting friends or family. Wal-Mart's are popular places to camp overnight, but have you ever considered where these are located? Often in areas ripe for stealth camping. By just exploring around you will find empty gravel lots and long empty curbs where you can pull-in and park overnight. I've also learned that people are very territorial about the curb space in front of their homes, but could care less about the ends of streets. Often there is adequate curb space here. Knowing the rules for parking are also a plus: your wheels must be within 12 inches of a curb, more than 15 to 20 feet from a fixture (which includes driveways, mail boxes, and fire hydrants) and 50 feet from an intersection. Keep all signs you are in your camper to a minimum; use only necessary lighting, black out curtains or lower blinds. Keep radios and TV volumes to a minimum. Do your shopping in the evening and then seek and stealth camp after 8:00pm. Leave early the next morning. 

              Mike: If you don't mind me asking, how much does it cost you per month to be a full-timer?

              Bryan: In all honesty, this should be the first question you ask yourself. Nobody wants to quit or fail, so establishing a budget was important for me. My original budget is much the same now as it was when I first started. A few things have changed. I had anticipated using campgrounds more, but that soon was thrown out the window! Also, not expecting the fuel costs to go up more than a $1 a gallon my first year was a surprise. Also, the cost of health care continues to increase. I set my mind to living for less than what it would cost me to pay for a mortgage or apartment. I did this because if I were to leave the road (What?! Am I crazy!!?) I'd still pay out the same amount of money for lodging and living expenses, so why not just live on that fixed cost?  I do, as my monthly budget (after health care/insurance/cell/Internet/sat TV are deleted) is approximately $750 a month for food, fuel, and entertainment. This figure was what my housing cost was prior to going on the road. The reality, I'm still living in a place, but my scenery changes frequently outside my windows!

              Boondocking at Teter Rock near Matfield Green, Kansas.
              Kayaking in Yellowstone National Park. 
              Grizzly bear near Bryan's campsite in Yellowstone NP.

              Mike: Do you have any favorite places or states where you like to explore?

              Bryan: Absolutely! What might come as a surprise to you is that my favorite state to visit is Kansas. I wish more people saw the Kansas I know, beyond the interstate highways. I have also spent considerable time backpacking through Yellowstone National Park. Every year I go back. In fact, I was there just a few days ago. I also love the Eastern Sierras and the Rocky Mountains as well as the Sonora, Mojave and Chihuahuan Deserts.

              Mike: Have you experienced any noteworthy run-ins with wildlife?

              Bryan: Actually, yes. I've had several run-ins with all kinds of wildlife, including grizzly bears. One of these was while solo kayaking at a back country lake in Yellowstone (permit required and hand portage only), I came around a peninsula into a cove and saw a grizzly sow, with cubs, in front of me on the embankment. I was so surprised I reached for my camera in the pocket of my PFD and completely forgot about the forward momentum that was carrying my kayak towards her. The grizzly sow became enraged and false charged towards me, coming to a dust throwing halt at the edge of the water. I somehow reacted by turning my kayak away with my foot mounted rudder controls. I am talking about just a few yards between the two of us and her cubs before I realized my stupid lack of priorities.

              The other time occurred while I was hiking up from a trail head in Yellowstone (I have spent 40 continuous years working, backpacking, and visiting this park). I had rounded a bend and found a grizzly bear occupying the trail directly in front of me. I stopped and started backing up until I was back around onto the aforementioned trail. Turning, I skedaddled back down the trail to my camper. I opened the door and grabbed my camera. Suddenly, I noticed the grizzly following behind me, down the trail from which I had just retreated. I stood behind another car parked at the trail head as I watched it walk up to my camper, pausing in front of my now opened door (in my hurry I forgot to shut it). I could see my dog sitting at the top of the stairs as the grizzly took a look at him. The bear soon turned, ambled across the trail head parking area and then across the road and into the forest, much to the pleasure of the passing tourists armed with cameras.

              Mike: Your photography is very impressive, Bryan. If somebody wanted to contact you about your photography, or wanted to talk to you more about your extreme boondocking, what would be the best way to contact you?

              Bryan: That is very kind of you, Mike. Thank you! While I am far from the level of a professional photographer, I have had some remarkable success with some of my work being published. I have a Facebook Photography Page titled, A Wanderer’s Photography, or you could contact me at my email address: shelby2141@yahoo.com. I look forward to hearing from anyone.

              Closeup of a Canadian Thistle and a ladybug.
              Thanksgiving Day sunset near Dodge City, Kansas.
              Claret-Cup Barrel Cactus flowers in full bloom.
               
              Mike: What meals do you typically eat as a full-time RV'er?

              Bryan: It has been no secret to my family and friends that many could starve to death hanging around with me. I don’t eat on a regular schedule and don’t have snacks with me. I enjoy ending the day with watching a sunset while eating dinner. What is a typical breakfast, lunch, and dinner look like? For me, when available, I eat eggs, cereal (cold or hot depending on the season) for breakfast. Lunch is often a sandwich, apple or almonds in a pack, as most days I am long gone from camp at this time of day. Dinner often finds me outside with one of my grills (propane or charcoal) cooking up a dinner of vegetables with salmon or chicken. I don’t eat very much red meat. I can usually carry enough foodstuffs to last six to eight weeks.

              Mike: Do you have any other hobbies or interests as they relate to the great outdoors?

              Bryan: My greatest interest is just that, the outdoors. I enjoy reading and often am found hiking to some location, just to set up and read a book. I love documenting the small details of the outdoors through my photography. It's great to spend time with friends, enjoying riding one of my motorcycles, hiking, kayaking, cross-country skiing or just simply watching a sunrise or sunset. It's not unusual for me to have my clock set to ring and remind me that it's “sunset time,” then the dog and I pause for a moment and just take in the wonderful show at the end of the day.

              Mike: Thanks for taking the time to talk, Bryan. You're definitely living the dream. Do you have any closing advice?

              Bryan: Yes, I do. Don’t delay taking the time to enjoy life away from work. Just spend that time with family, friends or maybe just sitting and watching the sun set for those few minutes. You can bet I will be out there doing just that for what I hope is for many years to come.

              Got Talons?

              $
              0
              0
              I got mine last week. What are Talons? Well, if you're familiar with Torklift's frame mounted tie downs for truck campers, Talons are simply Torklift's aluminum version of the same system. In fact, aside from the lightweight, military grade aluminum from which they're made and the color and shape of the tie down inserts (the Talon inserts are silver not black), there are very few differences between the two products.

              So why buy a set of Talons? Well, the fact that they're made of aluminum means they're lighter (a set of four Talons are a good 40 lbs lighter than the old steel version). When it comes to truck campers, every pound matters, especially if your truck and truck camper combo is pushing your GVWR. Another big benefit of the Talons is that they won't rust--no more cleaning and painting on an annual basis to keep them protected and looking good. The only real negative with the Torklift Talons is the cost--you'll spend a good $200 more for a complete set of aluminum Talons compared to the original steel Torklift tie downs.

              The Talon truck camper tie down system comes with four aluminum inserts, four aluminum frame mounted receivers that work similar to trailer hitch receiver, mounting hardware, and four finishing kit covers to protect the receiver tubes when the inserts aren't installed. Like all Torklift products, the Talon truck camper tie down system comes with Torklift's legendary lifetime warranty. Better yet, they're proudly made in the USA. If you're like me, this is important. Anytime I can help keep an American worker employed, I'm going to do it. Even if it means I have to pay a little more. I learned long ago that you get what you pay for and with Torklift, you get a product that works as designed and is covered with a lifetime warranty.

              Unfortunately, I have to wait a few months for the temperatures to cool down before I can install them. It's still too blasted hot here in Arizona to do anything outside. I'll probably install them in mid October. Oh, and in case you're wondering. The Talon inserts aren't interchangeable between the two systems. Meaning you can't put a Talon insert into an old steel tie down receiver; they're a bit too large. The picture below shows the physical differences between the two inserts.

              Old steel tie down insert (Left) and new aluminum Talon insert (Right).
                

              Mello Mike's Boondocking 101

              $
              0
              0
              The modern RV is a wonderful thing. It combines the mobility of an automobile with the comforts of home in one small, convenient package. Where you take your home on wheels and where you set up camp is entirely up to you. Many RV owners choose to camp at RV Parks and campgrounds, yet some find the crowds and noise of these establishments to be a big turn-off. Fortunately, there's a great alternative to campgrounds and RV parks and that alternative is known as boondocking.

              What exactly is RV boondocking? What does it mean to boondock? Boondocking is simply wilderness camping in a remote location without water, sewer, and electrical hookups. Unfortunately, the word is sometimes misused by Recreational Vehicle owners. Camping in a campground or RV park without hookups isn't really boondocking, this is more accurately known as "dry camping." Moreover, staying overnight at an urban location like at a Wal-Mart, a church parking lot, or a Flying J's to get some sleep isn't boondocking either, though you'll sometimes hear people refer to it as such. This type of "camping" is often called "overnighting,""stealth camping," or "Wally-docking." 

              Why Boondock?

              A poll taken in 2012 revealed that solitude and peace were the most popular reasons recreational vehicle owners preferred boondocking over campgrounds. If you've been to a campground lately, you know why. Campgrounds not only are crowded and lack privacy, but they're also noisy with generators, drunken neighbors, and barking dogs being the most common culprits. On the other hand, boondocking offers the solitude and peace most of us desire when we camp. Just how much depends on where you camp and how isolated you are, of course, but as a general rule you'll enjoy much more peach and quiet if you boondock.

              Boondocking has other benefits for the RV owner, too. Camping out in the "boonies" often means you'll be closer to nature and that you'll be able to gaze upon spectacular views. Whether it's deer feeding on grass near your campsite, a pair of eagles roosting in a nearby tree, or watching a roadrunner corral a small lizard, you'll have limitless opportunities to view wildlife in their natural habitat when you're camping off-the-grid. Indeed, if you're an avid bird watcher, boondocking is the best way to camp if you're trying to spot rare or hard to find species. And if you're into stargazing boondocking at higher elevations in remote areas means you'll be able to achieve better views by escaping view killing light pollution. Indeed, some of the best observatories can be found perched atop mountains and in national forests where boondocking is most plentiful.

              Another great thing about boondocking is that it's light on the wallet. As you know, RV parks, RV resorts, and campgrounds can be quite expensive, often setting you back $40 to $75 a night, and in some states, like California and Florida, even more. In contrast, boondocking is free. Some public lands may require a permit, but even if one is required, you'll usually pay nothing for a two week stay. There's no doubt about it, boondocking saves you money, and in these tough economic times, that's always a good thing. For those who full-time, boondocking is often how RV'ers make ends meet.

              Finally, boondocking allows RV'ers to be spontaneous since no reservations are required. This allows you to get up and go when you suddenly get the itch. You can't be this spontaneous when you're tied to campgrounds and RV parks because the best ones are generally full during summer weekends. Indeed, the better ones are often booked months in advance, especially during national holidays. That problem doesn't exist with boondocking. Just find a good looking spot in the wilderness or on the beach and set up camp. Plus, there's usually no one to check-in or out with!

              Where to Boondock?

              At this point you may be wondering, where can I boondock? Where are the best places to go? The most plentiful boondocking in the United States can be found west of the Mississippi on federal land managed by the U.S. Forest Service (USFS) and the Bureau of Land Management (BLM). The BLM oversees 258 million acres of federal land, about 13% of the U.S., while the USFS manages national forests and grasslands totaling 193 million acres, equal in size to the state of Texas. Generally, all of these areas are open to camping within 150 ft of roads as long as there are no signs that prohibit overnight camping (note that state and federal agencies don't use the term boondocking on their websites, they use the terms primitive or dispersed camping instead). Unfortunately, U.S. national parks typically don't allow boondocking (Death Valley and Big Bend National Parks being the most notable exceptions), camping is restricted to designated campgrounds only.

              While the most plentiful boondocking can be found on USFS and BLM property, there are excellent opportunities worth exploring elsewhere. U.S. Army Corps of Engineers land, state forests, and state wildlife reserves are often overlooked, yet offer terrific places where you can boondock. The Appalachian states and upper New England are loaded with state and federal lands and the state of Florida maintains several Wildlife Management Areas. Be aware that some states are more restrictive where you can boondock than others, and some don't allow boondocking at all, so do a little research before embarking on your trip. Obviously, great boondocking locations aren't restricted to the United States. Plentiful boondocking opportunities can be found in both Canada and Mexico and are simply too numerous to list here. 

              To aid you in your search for prime boondocking locations, pick up a recreational atlas or download a boondocking app on your smart phone. Official maps of federal public lands and state forests are also highly recommended. These detailed maps show longitude and latitude and terrain features such as lakes, streams, and rivers. They also show you where the logging and forest maintenance roads are located. These roads are the key to locating the best places to boondock, especially in national forests. For the most part forest maintenance roads which are open to the public have numbered signs. And if you happen to see a gate open that usually means the road is open for public use, too.

              If you're headed into an unfamiliar area, here are a few tips to help you locate level campsites. One is to "stealth camp" in an inconspicuous location like at a trail head or stay overnight at a nearby campground and scout out promising locations in a tow vehicle, motorcycle, or quad. You can document these locations using either a map or a GPS. If you're willing to camp on private land, try talking to locals in small rural towns. Deals can sometimes be arranged with owners to stay on their land--all you have to do is ask. The same goes for timber and paper corporations. You can find them primarily in the Northwest, but they can also be found in the Southwest, South, and even in Ohio. A few noteworthy timber companies worth talking to include Weyerhauser, Plum Creek Timber, and Potlach.

              One final thing to consider when looking for a boondocking location is the terrain and how your RV will handle that terrain. Generally, large RVs, like Class A motorhomes and fifth wheels, require firm and level terrain like the BLM areas found in the Southwest including the boondocking capital or the world, Quartzsite, AZ. Whereas, highly maneuverable, two-axle RVs with short wheel bases, like truck campers and small Class C motorhomes, are almost unlimited where they can go. Also, if you have to travel down a forest road be mindful of low-hanging tree branches that can tear open your roof or poke a hole in one of your skylights or vents. The bottom line is to use common sense where you boondock. The last thing you want to do is get stranded and have to call for help, or worse yet, kill yourself falling off an embankment. For an in-depth look at the best RVs for boondocking, click here.

              Other Boondocking Considerations

              Since you'll be camping off-the-grid, boondocking implies a level of conservation and self-sufficiency that can't be obtained in an RV park. This means reliance on your RV's 12 volt battery system for power, on your RV's fresh water holding tank for potable water, on your RV's black and gray holding tanks to collect waste water, and on your RV's propane tanks to fuel your refrigerator and furnace and to cook your food. This also means you won't be able to take "Hollywood showers" or leave the lights on when they're not being used. You can certainly do these things, of course, but you'll quickly run out of fresh water and you'll rapidly drain your 12 volt batteries. For additional boondocking habits and tips, check out my article, The 8 Habits for Highly Successful Boondocking.

              Boondocking in comfortable temperatures is important. The best way to do this is to find a place where temperatures are moderate. During the winter this is done by camping in southern latitudes at elevations below 3,000 ft like in the Southwest, in the deep South, and in Mexico, while during the summer this is accomplished by boondocking in either northern latitudes or at higher elevations, generally above 6,500 ft. To find locations at these elevations refer to the aforementioned atlases or download an elevation app on your smart phone. I recommend Altimeter+ by Sichtwerk AG.

              A few simple equipment modifications to your RV will make your boondocking more enjoyable. Things like installing at least two deep cycle batteries, swapping out the incandescent lights with LEDs to conserve energy, and installing a Fantastic Vent fan to help recirculate the air can make your boondocking much more enjoyable and less frustrating. Additional boondocking mods you can perform include installing a couple solar panels to keep your batteries charged and installing a special Oxygenics shower head to help conserve water during showers. For additional information on my top five boondocking mods, click here.

              In conclusion, if you find the idea of boondocking appealing, I recommend a few practice runs. You can do this either in your driveway or at a campground without hookups. It's a great way to "get your feet wet" by using some conservation techniques. Then you can try the real thing when you feel that you're ready. You may fumble and stumble the first time or two until you get the hang of it, but boondocking will eventually open up a whole new world to you and more opportunities to enjoy the mobility and comforts of your RV.


              A special thanks to Dave Rogers and Don Kingfield  for permission to use their photos. 

              The Eleven Benefits of Truck Camper Ownership

              $
              0
              0
              For consumers looking to buy a new RV, most never consider a truck camper and I think that's a serious mistake. Today's truck campers possess the same accouterments as the finest motorhomes and fifth wheels found in today's market. Indeed, some hard-side, long-bed truck campers offer large dry baths and sport as many as three slide-outs to increase living space. Most are also quite spacious and roomy and offer large kitchenettes and full-size queen beds. If you haven't been in a truck camper lately, you need to do so. You may be surprised at what you see.

              Aside from the standard creature comforts, the truck camper has much to offer the consumer. Like other RVs, truck campers come in various sizes and styles including long bed and short bed models, hard side and pop-up models, as well as slide-out and non slide-out models. You'll need a one-ton dually for the heavy, multiple slide-out models, but the smaller pop-up campers can easily be hauled by a half-ton pickup truck. Got an even smaller truck? Pop-up truck campers can also be purchased for the Ford Ranger, Chevy S10, and Toyota Tacoma.

              In spite of the differences between hard side and pop-up models and slide-out and non slide-out models, the truck camper has a common heritage with numerous things in common. These commonalities are what we'll examine in this article. It's also hoped that this article will explain why the truck camper makes such a great RV and will help buyers make a more informed decision. Now let's take a closer look at the eleven benefits of truck camper ownership. 

              1. Unmatched Versatility:

              Without a doubt, the truck camper is the most versatile RV on the market. The combo provides a rock-solid platform for towing things like Jeeps, trailers, and boats. But that's not all. The fact that you can unload the truck camper from your pickup truck allows you to not only use your truck as a daily driver at home, but also gives you the ability use it on outings for things like four-wheeling, collecting firewood, or taking your boat to the lake. No other single RV on the planet can do all of these things like the truck camper can.


              2. No Registration or Insurance Fees:

              Did you know that 39 states still classify the truck camper as cargo rather than an RV? It's true. That means if you live in those states you won't have to pay annual license and registration fees. Insuring a truck camper is cheaper, too. There's no need to individually insure it, your auto insurance policy will cover it when it's mounted to your truck, while at home it will be covered by your home owner's policy. Just make sure you don't go over your truck's GVWR as this could void your coverage. As you can see, owning a truck camper can save you hundreds of dollars a year in insurance, fees and taxes.

              3. Superb Maneuverability:

              The maneuverability of a truck camper is hard to beat. The compact size of the truck camper coupled with the small turning radius of the pickup truck means you can maneuver out of trouble much easier than with towable RVs and large motorhomes. The size and maneuverability of this combo also means you can park practically anywhere in town--you won't need to take up 15 parking spaces at the back of the parking lot just to go shopping or eat at a restaurant. It also means that you can park in small, national forest campgrounds and negotiate steep and narrow mountain switchbacks. Due to its superb maneuverability, there are few RV's I would rather be in when exploring unknown roads and new territory than the truck camper. 

              4. Easy to Drive:

              If driving a large motorhome or pulling a massive fifth wheel or travel trailer intimidates you or has lost its appeal, then you'll love driving a Truck Camper. Owning a truck camper means you won't have the hassle of hooking up a trailer hitch and anti-sway tow bar before leaving on your trip. Not only that, but you won't have to worry about fish-tailing on the freeway from heavy winds and passing semi-trucks, nor avoid inattentive drivers merging on the interstates. Both men and women enjoy the ease and simplicity of driving a truck camper. In fact, it's really no different than driving a regular pickup truck. My wife, who would never take the wheel towing a travel trailer, enjoys driving our truck camper.

              5. Outstanding Boondocking Capability:

              If you like to explore and boondock far off the beaten path, then the truck camper is one of the best options out there. Why? Well, the compact size and two-axle configuration means you can go places where the typical large RV can't. Add the go-anywhere capability of a 4x4 pickup truck mated with a pop-up truck camper and you'll be able to go practically anywhere your heart desires. Travel down remote, narrow forest roads on the North Rim? Sure! Climb steep hogbacks in Moab, Utah? No problem! Spend a few weeks at Quartzsite during the winter? Absolutely! When you own a truck camper the world is at your doorstep.  

              6. Cheaper to Maintain:

              With no towing or running gear, the truck camper is the cheapest RV to maintain. If you've owned a travel trailer or fifth wheel before, you know the time and cost involved in maintaining the tires, bearings, and brakes. It can be a major pain. With the truck camper all you need to do is maintain your truck as you normally would do with periodic servicing. Yes, it's true that the camper itself will need periodic maintenance as well, but in the long run, you'll spend much more time enjoying your truck camper rather than working on it. Always a plus in my book.


              7. Better Fuel Economy:

              With the cost of diesel fuel and gasoline in today's economy, every mile counts. On average, truck campers get better fuel economy than the typical RV. Indeed, most truck camper owners are realizing anywhere between 10 to 15 MPGs (my 6.2L V8 gas engine with a 3,000 lb camper typically gets a little over 12 MPG). Low profile, pop-up truck camper owners realize even more savings by using a diesel pickup truck to haul their camper. Some diesel owners have claimed as much as 20 MPG hauling around a light-weight, pop-up truck camper! Try getting those numbers with another RV. It isn't going to happen.

              8. Easy to Store:

              The compact size of the truck camper means that storing it will be less of a hassle. Most of us live on small lots of one-third of an acre or smaller. This means that a small RV like the truck camper will be much easier to store than a massive fifth wheel or Class A motorhome. Still, if storing an RV on your property isn't possible due to HOA regulations or other limitations, then storing a small RV like a truck camper means you won't have to pay as much for storage fees. Oh, and one more thing. Unmounted truck campers are much more difficult to steal than other types of RV's. Just make sure you store the electric jacks remote and electrical umbilical cord separate from the camper.

              9. Great Bug-Out Vehicle:

              Need emergency shelter due to an approaching storm, fire, or flood? No problem with the truck camper. The amenities and compact size of the truck camper means you'll have all the essentials you'll need to get you and your family through an emergency. If you think a truck camper is too small. Think again. You can easily survive a couple weeks in a large, solar-powered truck camper stocked with food, water, and fuel. In most cases two weeks is more than enough time for the trouble to pass. The small size of the truck camper also makes it more stealthy in a bug-out scenario compared to other RV's and more likely to avoid unwanted attention. This means it can be parked practically anywhere including an empty lot or family member's driveway. 
               
              10. Upgrade and Maintenance Independence:

              Since the pickup truck and camper are two separate units, upgrading one or the other is much easier. Need a bigger pickup truck with more payload and 4x4 capability? Then get one. Want a bigger truck camper with a slide-out and more room? No problem, buy it. This versatility when it comes to upgrading doesn't exist with the motorhome--it's all one unit. One other thing about the truck camper. The fact that the truck and camper can be separated also means that taking one to the shop is much easier; you can still use one while the other is at the shop. Nice!


              11. Excellent Depreciation Value:

              The versatile truck camper holds its value much better than the typical RV. Why? Two things: the smaller niche truck camper market and the fact that truck campers are built better than your typical RV. Most truck camper manufacturers are industry leaders in quality, design, and innovation and often customize their products to meet the requirements of each individual truck camper owner. This quality and attention to detail means a better product for you that will provide many years of quality service.

              These are the primary benefits of truck camper ownership. There are certainly others, but these are the ones that really standout above the rest. Is the truck camper for everyone? Of course not. Full-timers who need more living space and those who have physical limitations won't like what the truck camper has to offer. But the truck camper does provide unmatched capabilities and benefits that can't be beat by other classes of RVs. So if you're thinking about buying an RV, give serious thought to the versatile truck camper. It might be one of the best decisions you've ever made.

              A special thanks to Northstar Campers, Jim Caruthers, Randy B. (Ramlinwillie), John M., Dave Rogers (Whazoo), Jim W. (Boatycall), and Laurie Heimbigner for permission to use their photographs.

              Interview with XTC Enthusiast, Alex Blasingame

              $
              0
              0
              If you enjoyed my recent interview with Extreme Truck Camper (XTC) expert, Jeff Reynolds, then you'll enjoy this interview with another XTC enthusiast, Alex Blasingame. Known as c.traveler2 on the Internet forums, Alex has been exploring the back roads of the inter-mountain west since 2002. He is 62 years old, has been married to his wife, Julie, for 12 years, and currently works full-time as a Stationary Engineer for the state of California and part time as a heating and air conditioning contractor. Alex will soon be retiring after which he and his wife plan on dedicating even more time to camping and exploring.

              Mike: Thanks for taking the time to talk, Alex. How long have you been RV’ing?

              Alex: Well, I’ve had two separate periods of RV'ing in my life. About 30 years ago I owned a 24 ft. Rockwood travel trailer. The trailer didn’t get much use in the two years I owned it, so I sold it. Our current RV time has been about 12 years.

              Mike: What truck camper do you presently own and why did you choose it?  

              Alex: We own a 2002 Lance 815 which we bought new in 2002. After suffering a bone-chilling night tent camping in a campground back in 2001, we decided we had enough with sleeping on the ground. So we started a one-year search for a different way to camp. We looked at all kinds of RVs including motorhomes. In the end, we chose a Lance 815 which we found at a local RV show in Pomona, CA. It also happened to be their showroom model. We also liked that Lance was a local manufacturing company for service reasons in case anything was wrong with it.

              Mike: With your love for exploring off-road, why did you decide on a hard-side truck camper rather than a pop-up?

              Alex: Being able to just open the door and walk inside without having to raise the roof was something we really liked. Pop-ups also have a canvas strip that has to be dealt with while raising and closing the roof and the pop-ups we saw at the time were of poor quality.

              Mike: What modifications have you made to your truck camper to make it more off-road and boondocking friendly?

              Alex: First thing I did was to replace my 4x2 drive truck with a 4x4 drive truck. This was the most costly modification I made. Cabinet dividers were also installed in the camper to prevent items like dishes and glass from being thrown about while driving off-road. A couple of years ago I had installed an 85 watt solar panel to help keep my batteries charged. The Lance 815 has an over head cabinet above the dining table that folds down for extra storage. We use plastic storage bins up there for extra tools, clothes and linens. I recently removed the roof top air conditioner to reduce topside weight. This has made a big difference off-road. One of my last mods was swapping out my old propane refrigerator for a Dometic CR1110 12 volt compressor refrigerator.

              Alex & Julie entering the Tuweep Area, Grand Canyon NP.
              Alex on a steep decent on the White Rim Trail, UT.
              Alex on the Mojave Road, CA.

              Mike: It seems like the 12 volt compressor refrigerators are becoming more popular with those who like to boondock. How do you like yours and how easy was it to install?

              Alex: Its made a big difference in our boondocking. It's great having a refrigerator that's always a steady 34F degrees inside, even when it's plus 100F degrees outside. The install was pretty simple and only took about four hours. Doing the research for a replacement refrigerator actually took a lot longer than doing the install. It took some effort to find a compressor refrigerator that could not only fit in the existing cabinet cavity, but also fit through the camper door. Since the install, I've upgraded the refrigerator wiring from 8-AWG to 4-AWG and installed an Interstate 4D 1300 heavy duty Marine/RV battery.

              Mike: What pickup truck do you presently use to haul your truck camper?

              Alex: Our current truck is a Ford F-250 extra cab, long bed with the 6.0L Powerstroke turbo diesel. I’ve always preferred Fords. As a kid, my Dad had a Ford truck that he beat without mercy. It would just keep running. Because of the way my Dad had treated his Ford, I grew up believing that they are very durable, so I also bought one. My Ford has served me well in all of my back country adventures.

              Mike: Why did you decide on buying a diesel?

              Alex: The choice of going with a diesel was new to me and very frankly was a roll of the dice with Ford’s 6.0L diesel being so new and an unknown. Nevertheless, I've been very happy with the reliability of the 6.0L PSD. Having a high RPM diesel has proven a big benefit when climbing steep grades. Just a quick note, the 2007 F-250 6.0L diesel isn’t the first one that I’ve owned. In 2003 I bought my first one and, yes, it was the 6.0L PSD.

              Mike: I had good luck with the Ford 6.0L PSD, too. What aftermarket modifications have you made to your truck to enable it to go off-road?

              Alex: Two big things that I learned from Jeff Reynolds was to get the rear spring to engage as soon as possible and to correctly deflate the truck's tires for off-road use. To engage the rear springs sooner, I fabricated a couple overload posts with the help from my friend, Dave. These posts not only provide a higher rear departure angle, but they also provide a much better ride off-road.

              One of the things that Ford trucks are famous for is their frame flex. Trying to lessen the effects of this flex is difficult. There were many times when I was off-road that the cab would slap the overhead of my camper. To correct this, I built a plywood platform that raised the camper about 4.5 inches. I also incorporated two drawers with sliding trays into the platform for extra storage and for tools. The platform not only has eliminated all cab slapping, but it has also reduced wind noise on the highway which was an unexpected and pleasant surprise. I've also decided to install an extra overload spring on the rear. I believe that this will help reduce side-to-side sway and will improve the rear departure angle. I used to have air bags on the truck, but I removed them. Air bags are counterproductive to off-road travel and greatly increase side-to-side bouncing.

              Alex stretching his legs during an XTC run.
              Alex and Julie relaxing on the Grand Canyon North Rim. 
              Alex's plywood platform for hauling his truck camper.

              Mike: What tires do you have on your truck and what inflation values do you typically run when driving off-road.

              Alex: I presently have BF Goodrich All Terrain 285/R70-17E tires on the Ford stock chrome steel rims. The BF Goodrich tires have proven themselves a good and durable tire for off-road use. It took some time to find a pressure setting that worked well with my rig. As Jeff Reynolds would say, “get those tires to work as part of the suspension.” I've discovered that between 35-40 psi works best for my rig during off-road travels.

              Mike: You're also a big boondocking enthusiast. What advice would give to those who are boondocking for the first time?

              Alex: For your first boondocking outing pick a place that is easy. The RV.NET Truck Camper Forum is a great place to ask experienced boondockers about places where you can camp. Be prepared for emergencies as much as possible. Have a couple Motorola FRS Radios if traveling in a group and stay close. Also, bring a camera. You never know when you're going to need it or when you're going to want to take pictures.

              Mike: What is the scariest incident you've experienced during your adventures?

              Alex: That would have to be the flash flood we were caught in south of Grants, NM back in July 2004. A microburst had struck the Narrows area and the South Narrows campground where we were camped quickly began to fill up with water. Within minutes the water was nearly up to the windows of my truck. Fortunately, another RV'er was able to call 911 on his cell phone and soon rescue crews were on their way to help evacuate everyone from the campground. We were fortunate to get out alive. Not only was the water chest high and fast flowing, but it was also icy cold from the rain and hail. I couldn't even feel my feet and one of the rescuers had to be treated for Hypothermia. The funny thing is, when we first arrived we stopped at the El Malpais Ranger Station and asked about the storm and the potential for flooding. They told us that flooding wasn't a problem. This was the first time that this BLM run campground had ever flooded out! 

              Mike: Wow, that's crazy. I'm glad you and your wife made it through without harm. Did your truck and camper suffer any permanent damage?

              Alex: Yes. My brand new 2003 Ford F-250 (26,000 miles) was a total loss (36,000 dollars). The electrical systems were completely shorted out and ruined and the interior smelled like a damp, moldy basement. The only loss in the Lance camper was the inverter and the food in the camper. The camper itself suffered no permanent damage, not even mold. With the help of my brother, Martin, we hauled the camper back to Southern California using my old 1984 Chevy half-ton.

              Alex's truck and camper engulfed in a NM flash flood.
              Hugging a steep cliff on the White Rim Trail, UT.
              Alex on the famous White Rim Trail Hardscrabble.

              Mike: Do you have any favorite trails or roads you like to explore?

              Alex: I don’t have a favorite trail right now, but as far as roads go Utah Route 12 is my favorite. You can go from desert geology to high mountain forests along this roadway with endless spur trails to explore.  

              Mike: I absolutely agree with you on Utah Route 12. Which trail thus far has posed the biggest challenge?  

              Alex: That would have to be the White Rim Trail in Canyonlands National Park (Island in the Sky region). Julie and I recently came back from the trail and we were able to complete the entire drive for the first time. We were unable to complete the drive on our three previous attempts because the Green River side had been wiped out by floods. With this trail, weather is the most important factor in completing it. If the Green River side happens to get flooded out, it's a long way back to get out. As for the trail itself, negotiating the Hardscrabble switchbacks is probably the most challenging part. In some places the switchbacks are very steep and narrow and require your full attention. During our last trip, we discovered that we had cell phone service (Verizon) in several spots. This was a pleasant surprise since on previous trips we had none.

              Mike: The White Rim Trail is at the top of my bucket list. What advice would you give to those who are tackling the trail for the first time?

              Alex: Have your fuel tank as full as possible in case you have to come back out the way you came in. Bring plenty of water, even during the cooler weather. You can easily get dehydrated in the high desert. Stay on top of the weather reports. Take your time on this trail. If you try to speed your way through the only thing you’ll do is tear up your rig and not enjoy the journey. If you have air bags lose the pressure and get those rear springs engaged. You'll also want to lower your tire pressures for better traction and for a better ride.  For those with larger rigs great care must be taken. In some places my rig didn’t have much room to get by and the departure angle in some places is very sharp. Because of this I recommend taking nothing than 20 ft long, nothing more than 11 ft tall, and nothing more than 90 inches wide. If you're tackling the trail in a truck camper, remove the rear jacks to improve your departure angle.

              Mike: Do you have any other hobbies as they relate to the great outdoors?

              Alex: I’ve been doing photography for several years, but nothing really serious until I got my SLR camera and a GoPro portable video camera. I’ve entered the Truck Camper Magazine calendar contest every year since it started and I’ve had to step up my photographic skills in order to compete. I recently picked up a small telescope and now I have to learn how to use it. The places where we truck camper owners go to boondock are great for stargazing.

              Mike: Do you have any final advice for our readers?

              Alex: Use the great websites that are out there for information on truck campers such as the RV.NET Truck Camper Forum, this blog, the Wander the West website, and Truck Camper Magazine. Don’t be afraid to ask questions thinking you’ll appear foolish or stupid. The answer could get you out of a difficult situation or even save your life. But most of all get out there and enjoy your rig and explore. Travel while you can.
              Viewing all 66 articles
              Browse latest View live